Apr 10

Quality captioning in Storyline 360 — Part 2

A Definition of Captioning
Captioning is the key to opening up a world of information for persons with hearing loss or literacy needs. There are more than 30 million Americans1 with some type of hearing loss. Millions of others are illiterate2, learning to read, or use English as a second language… Captions not only display words as the textual equivalent of spoken dialogue or narration, but they also include speaker identification, sound effects, and music description. Captioning is critical for students who are deaf or hard of hearing, but it also aids the reading and literacy skills development of many others.
—The Described and Captioned Media Program
  1. Around 466 million people worldwide have disabling hearing loss, and 34 million of these are children (World Health Organization).
  2. While… only 14% of the world population, in 2016, remained illiterate… the poorest countries in the world, where basic education is most likely to be a binding constraint for development, still have very large segments of the population who are illiterate (Our World in Data).

In Part 1 I introduced the
DCMP Captioning Key and some evidence-based principles they have developed that are especially suited to learning tools.

In this part I’ll show you how the DCMP guidelines informed my implementation in the well known eLearning tool we’ve adopted where I work, in part because of our ability to add this customization, Articulate Storyline 360. I’ll share a custom “style” that’s nothing more than a snippet of CSS code. I’ll show you how I make the custom style work in the AS360 desktop app Preview and persist from one publication to the next. Then, in a final Part 3 I’ll introduce a free, open source tool I’ve been using for several years and show you how I use it to assure the quality of my closed captions, and finally import those captions into AS360. I see two distinct pieces to this endeavour: the presentation—where it will appear and what it will look like—and the composition of the captions themselves, which includes where to break lines, how they’re formatted and how to get them into Storyline 360.

What level of quality can we achieve with Storyline?

The DCMP acknowledges, “It should be noted that the best practices detailed in this guide are not always possible to follow due to technical limitations.” So the first question is, “where do we set the bar for our particular software?”… Storyline 360, published as HTML5-only, in the case we’re considering today. This means whatever we decide will be governed by Cascading Styles Sheets (CSS). If you don’t know a thing about CSS don’t fret—I’ll show you a way to practice that won’t break your system. One of the reasons I like AS360, and recommend it highly for organizations and individuals who have a budget permitting the use of proprietary tools, is the discovery that all the CSS code for the captions is included in a single style statement:

.caption p {
  display:inline-block;pointer-events:none;padding:10px;
  text-shadow:-1px 0px black, 0px 1px black, 1px 0px black, 0px -1px black;
  color:#ffffff;border-radius:4px;background:#31373a;
  margin:0 0 10px 0;padding:10px;text-align:center;line-height:1.5
}

This snippet creates a style named caption that affects every paragraph (p) within an area (“division”, denoted div) assigned that style. It’s built of properties, such as display and pointer-events, separated from their qualities, e.g., inline-block or none by a colon, and from each other by semicolons. We don’t want to change anything we don’t understand, so we’ll be careful to choose only complete pairs of stylistic items for which there are guidelines in the DCMP Captioning Key—presentation look. These are separate and distinct from temporal elements such as presentation rate that influence caption duration. We can eliminate the spatial element location; this is a technical limitation of AS360 we can’t easily overcome at present, so the guidelines for Caption Placement, the preferred method of speaker identification, will have to wait. (We’ll mention a suitable alternative we can implement with Subtitle Edit in Part 3.) Storyline places all captions on the bottom two lines only, so we’ll also have to accept that ours might at times obscure some content. We’ll use transparency to deal with that.

The Captioning Key considers all of the following “guidelines” elements of the Text.

“Look” we can work with

  • Font (typeface) characteristics must be consistent throughout the media
    • “…medium weight, …sans serif… proportionally spaced… with descenders that drop below the baseline…”
      The Open Sans and the PT Sans font families are popular suitable choices known for high readability1.
    • colour: “The use of white characters is preferred.”
    • size: (about) 24pt equal 32px (pixel values (px) is a good static, OS-independent, cross-browser choice… )
    • and style.
      …have a drop or rim shadow… should be left aligned when technically possible
  • …The use of a translucent box is preferred so that the text will be clearer, especially on light backgrounds.

Those are all things we can easily set without interfering with the rest of the default Storyline code. The defaults already provide white text with a shadow, but the font is small and the box is opaque. Text is centre-aligned, which is okay, but we can easily meet the guideline; we can choose open Sans in the Player settings, but I’ll set it here too so no one can change it.

Font size is easy to set, but likely the most subjective on the list. The Captioning Key itself doesn’t specify 24 points in the sections I’ve linked to, but it’s found elsewhere and the examples there support a similar number. Technically, browsers and monitors do their own thing with it regardless, so the pixel unit is considered a good choice—but even that’s relative to the user’s own preference settings. The standard conversion of 24pt to 32px was too large for my liking, so I’ve settled on 28px, but that’s still too large for mobile (often causing 2 lines to become 3). 21px looks good on my iOS devices. Articulate recently included a separate mobile style sheet, so it’s easy to make that happen.

Following are the settings I’ve chosen, which remain somewhat flexible.

  • background:rgba(72,72,72,0.81); That’s actually a translucent grey. You can experiment; the first three numbers should always be the same and the last is opacity, from 0.0 (fully transparent) to 1.0 (fully opaque).
  • font-family:"Open Sans",Arial,Helvetica,sans-serif; The browser will choose Open Sans if it’s on the computer or on your server as a webfont. Otherwise offer Windows and Mac standards, or the first sans-serif font the browser can find
  • font-size:28px; for desktop, font-size:21px; for mobile
  • line-height:1.18; This seems quite adequate.
  • text-align:left !important; The ‘ !important’ is a CSS trick that’s necessary here (it’s about that word ‘cascading’ in Cascading Style Sheets)
  • text-shadow:black 0 0 3px; I centred the shadow and made it 2 pixels larger.

The complete revision, what we’ve changed and what we haven’t looks like this:

.caption p {
  background:rgba(72,72,72,0.81);
  border-radius:4px;margin:0 0 10px 0;
  color:white;
  display:inline-block;
  font-family:"Open Sans",Calibri,Arial,Helvetica,sans-serif;
  font-size:28px;
  line-height:1.18;
  padding:10px;
  pointer-events:none;
  text-align:left !important;
  text-decoration:none;
  text-shadow:black 0 0 3px;
}

We don’t add CSS to a live server fully expanded like that, however. I’ll provide you with “minimized” versions you can use further down.

Putting it back together

On a Windows system Storyline stores this information in three template files it writes from for Preview and Publishing. I use a free text editor called Notepad++ to open these, search for the default code I showed above in its minimized form, and replace it with the minimized code below.

Code to Find in all three files that follow:

.caption p{display:inline-block;pointer-events:none;padding:10px;text-shadow:-1px 0px black, 0px 1px black, 1px 0px black, 0px -1px black;color:#ffffff;border-radius:4px;background:#31373a;margin:0 0 10px 0;padding:10px;text-align:center;line-height:1.5}
  1. C:\Program Files (x86)\Articulate\360\Storyline\Content\dark-spider\unified\html5\lib\stylesheets\main.min.css
  2. C:\Program Files (x86)\Articulate\360\Storyline\player\unified\html5\lib\stylesheets\desktop.min.css
  3. C:\Program Files (x86)\Articulate\360\Storyline\player\unified\html5\lib\stylesheets\mobile.min.css

Code to Replace it with in files 1 & 2:

.captionp{background:rgba(72,72,72,0.81);border-radius:4px;margin:0 0 10px 0;color:white;display:inline-block;font-family:"OpenSans",Arial,Helvetica,sans-serif;font-size:28px;line-height:1.18;padding:10px;pointer-events:none;text-align:left !important;text-decoration:none;text-shadow:black 0 0 3px;}

Code to Replace it with in file 3:

.captionp{background:rgba(72,72,72,0.81);border-radius:4px;margin:0 0 10px 0;color:white;display:inline-block;font-family:"OpenSans",Arial,Helvetica,sans-serif;font-size:21px;line-height:1.18;padding:10px;pointer-events:none;text-align:left !important;text-decoration:none;text-shadow:black 0 0 3px;}

I choose Notepad++ for this because it keeps these files open, notifies me whenever they’re change after a Storyline update, and automatically relaunches itself with Administrator privileges if I forget to open it that way and try to save any of these to Program Files(x86).

One of the minimized CSS files, modified with Notepad++

If you’re nervous about testing this process out in the program templates, you can try it on a published module first. Depending on how recent your AS360 version is you’ll find main.min.css and/or desktop.min.css and mobile.min.css in
module-name - Storyline output\html5\lib\stylesheets

Summary of Part 2 and segue to Part 3

In Part 2 we explored the rationale for customizing the stock Storyline code, identified what’s possible with this particular software, revised the stock code, and saw where to place it so it’s in our previewed and published output.

Part 3 will look at Subtitle Edit, and how to set it up to speed up the process of creating quality closed captions for our learning modules. The DCMP site provides many examples of right and wrong choices for splitting lines other aspects of captioning and we won’t be able to discuss them all, but I’ll leave you with the basics and enough to take it forward from there. In the end you’ll be able to caption with Subtitle Edit, save the file in a suitable format, and import it into Storyline 360 using the relatively new Media Library.

Part 3 to follow soon. Thanks for reading!

§

Reference

1. Golombisky, Kim and Hagen, Rebecca (2017). White space is not your enemy : a beginner’s guide to communicating visually through graphic, web & multimedia design. Amsterdam ; Boston :Focal Press/Elsevier, 312pp.

Apr 10

Quality captioning in Storyline 360 — Part 1

Captions are for everyone

Captioning is the process of converting the audio content of a television broadcast, webcast, film, video, CD-ROM, DVD, live event, or other production into text and displaying the text on a screen or monitor. Captions not only display words as the textual equivalent of spoken dialogue or narration, but they also include speaker identification, sound effects, and music description. Captioning is critical for students who are deaf or hard of hearing, but it also aids the reading and literacy skills development of many others
The Described and Captioned Media Program

I work at an organization that advocates for inclusive design in all areas of society. It’s important to lead by example and so I strive for maximum accessibility in all our learning tools. I’ve led us to adopting high standards for closed captions, based mainly on the Described Media and Captioning Program (DCMP) captioning key, with some variations suggested by the Canadian Hearing Society’s Barrier Free Education Initiative and The Canadian Association of Broadcasters CC Standards and Protocol… August 2012 (PDF).

This post will be in three parts. Part 1 provides background. Part 2 will provide CSS code that approximates DCMP presentation guidelines for use in Articulate Storyline 360, and I’ll show you where you to put that code in AS360’s program templates folder so your quality captions appear automatically when you preview or publish a learning module using the AS360 desktop application, and Part 3 will present a tutorial on creating quality captions tuned to the DCMP’s guidelines using the free, open source editor Subtitle Edit,

A basic principle of inclusive design is designing for outliers. The Inclusive Design Research Centre says, “…Inclusive design should trigger a virtuous cycle of inclusion, leverage the ‘curb-cut effect’, and recognize the interconnectedness of users and systems.” The ‘curb-cut effect’ refers to the sloped cuts in the curb at intersections that were originally put in place for people in wheelchairs and that probably all of us sooner or later come to value.

And so it can be with closed captions — designed for the hearing impaired, they’re useful to anyone in a setting where for any reason it’s too hard to hear or, conversely, one wishes to enjoy video content but not to be heard. Presented also as “subtitles”, captioning is often vital to language learners and all those wishing to expand markets or impact diverse demographics.

The DCMP has studied this topic for over 20 years and more than anyone I can think of understands how the ‘curb-cut effect’ applies in this context. Perhaps the outliers among outliers are those with cognitive disabilities. To meet the needs of everyone quality captions contain each of the following elements. Quality captions are accurate—word-for-word, except in very specific circumstances I’ll discuss later—consistent, i.e., uniform in style and presentation, clear, representing the audio completely, identifying speakers and non-speech information, to provide clarity. They must be readable: displayed with enough time to be read completely, in sync with the audio, and neither obscured by nor obscuring the visual content. Equal access considers learners’ cognitive diversity, requiring that the meaning and intention of the material are completely preserved, not only in ways that benefit the hearing impaired.

Nonetheless, as with all forms of communication, one must always consider the audience. As an infamous (and fictitious) pirate of the Caribbean once said about a much different code, the finer details of quality captioning remain “…more what you’d call ‘guidelines‘ than actual rules” (Captain Jack Sparrow). In Part 2 I’ll summarize some key points I try to maintain in every case, discuss some instances where I might consider bending the rules, and describe some situations where one clearly must improvise. I’ll translate all that into a snippet of CSS code that works with the elearning software I use, Articulate Storyline 360 (AS360), and show you one way to make it work in AS360 so it’s applied in both previewed and published slides and persists between publications.

See you soon.

Part 2–>

§

Feb 08

Scales of Justice — sprite animation in CrazyTalk Animator 3

I’m taking a lovely MOOC on FutureLearn, called Filmmaking and Animation in the Classroom. I’m going to show you how to animate a Scales of Justice using CrazyTalk Animator 3. Although I’ve chosen to demonstrate making Scales of Justice, this process is very similar to any other stop frame animation, and you can use any set of image sequences you choose.

‘Sprite’-based animation using a sequence of stills

With CrazyTalk 3 open in Stage Mode and your timeline at Frame 1, go to the create menu, and choose create media, props. Navigate to the folder that contains your static images. You can drag your mouse or press control + A to select all the images and then press Open.

Your new prop will appear in a red box, displaying only the last image in your set. These images are the new prop’s “sprites” and to choose between them we’ll use the Sprite Editor. To open the Sprite Editor use the icon on the toolbar, go to the animation menu and choose sprite editor, or press the letter S.

My Scales of Justice prop using sprite animation

“One-shot” video, What is ‘Primacy?’   For best results view Full Screen
The red box turns green to show we are editing the prop, and the editor displays all the prop’s sprites. The highlighted sprite is the one currently displaying, but the first image on the list, the one with a special icon in the lower right corner, is the default image. In my case I want to start my animation from the default image, so I will select that image now. It becomes highlighted and the display changes.

To animate our scales we’ll advance the frame and choose different images. Crazy talk also has an advanced timeline that keeps track of everything we can do to our prop, but we don’t really need it for simple sprite animation. My animation is running at 30 frames per second, so every three frames represents 1/10 of a second.

Now, I’ve numbered all my sprites to make it easier for me to keep track — the numbers beginning with zero tilt to the left, and the numbers counting by 10s tilt to the right. I’ll advance my frames by three and change the sprite image until I get to 04, then I’ll backtrack to 00 and go ahead with images 10 to 40, and finally backtrack once more 00.

Now I’ll rewind my animation and press play. We can open the timeline to see more clearly what we’ve done. The little diamonds represent “keyframes” corresponding to the image changes we’ve made, and you’ll notice they’re always three squares apart, representing three frames or 1/10 of a second. In real life a scale might move more slowly at the top and the bottom of its swing, swing a little less each time, and eventually settle in the middle.

We can drag these keyframes to new positions on the timeline, copy paste, and even delete ones we don’t want. The scale will move faster when the key frames are closer together, and slower when they’re further apart.

I experimented and ended up with this animation which is 180 frames, or 6 seconds of motion, followed by 2 seconds of nothing, so you can see that the scale has stopped. To save your animation go to the file menu and switch to composer mode, and then choose file, save prop. Your new prop will be found in the content Manager under the Custom Props tab.  

CrazyTalk Animator 3 also makes it easy to render your animation as an MP4.

§

Feb 02

Let’s play some Blues

In a repressed society, artists fulfil a sense of harking back to instant gratification, or immediate expression, by doing things that function on the edge of society, or outside of what is conventionally accepted.
―Bat for Lashes
Instant gratification is like instant coffee, only it won’t keep you up all night.
―Jarod Kintz

The importance of instant gratification must never be underestimated, even as we shun the pitfalls. As a guitar student, I know I “both impressed and vexed” my teacher by practicing, and to a fair degree learning material he thought a year or more down the road, instead of what he assigned me (he told me so in so many words). As a guitar teacher in a music store there was also an economically practical reason to get kids “playing something” as quickly as possible, namely to keep them coming back every week, and their parents smiling. This week’s ukulele lesson will apply some of the approaches I came up with way back then, while hitting today’s (Ontario, Canada’s) curriculum expectations for the age group. 

Today they’ll hear some Blues, play some Blues and with any luck begin to feel their own Blues… in 12 bar cycles of 4/4 time! 

Musical content

I’ll use technology—the ‘TuxUkulele’ track introduced last lesson [video]— to walk them through counting and time signature. They’re already good at the counting part and today I’ll teach a 4/4 conducting pattern, showing patterns of other time signatures in the process. 

Image, conducting patternImage, conducting patternImage, conducting pattern

Conducting Patterns
3:4     4:4     6:8

We don’t have computers with our ukes at present, and I won’t subject them to a lecture with a software demo. I’ll always start with a hello and a review and teaser, but then we’ll get the instruments out and begin strumming and playing notes. 

I’m walking back one step from last week. My goal for today is to do a blues “vamp” on the Bb chord, and a “lick” (also “riff” and yes, “motif”) with a triplet feel over top of it.

With ukes in hand…

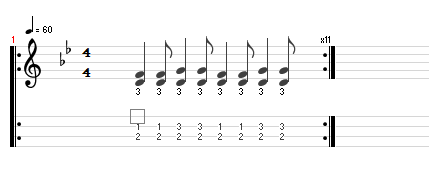
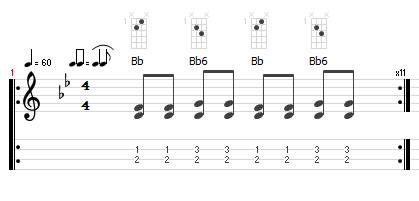
  1. [TuxGuitar (*.tg) file] Teach vamp… with and without “swing feel”
    image, notation and tab for lessonimage, notation and tab for lesson
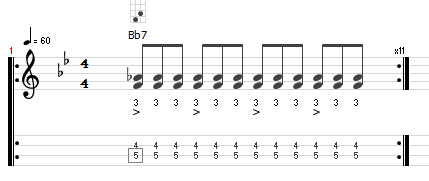
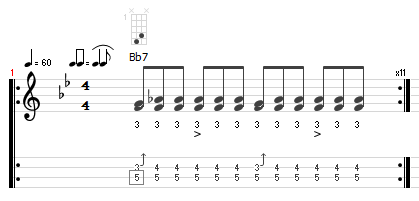
  2. Teach lick… Swing feel makes no difference. Why? Bends and slides cool, ambiguous major/minor 3rd
    image, notation and tab for lessonimage, notation and tab for lesson
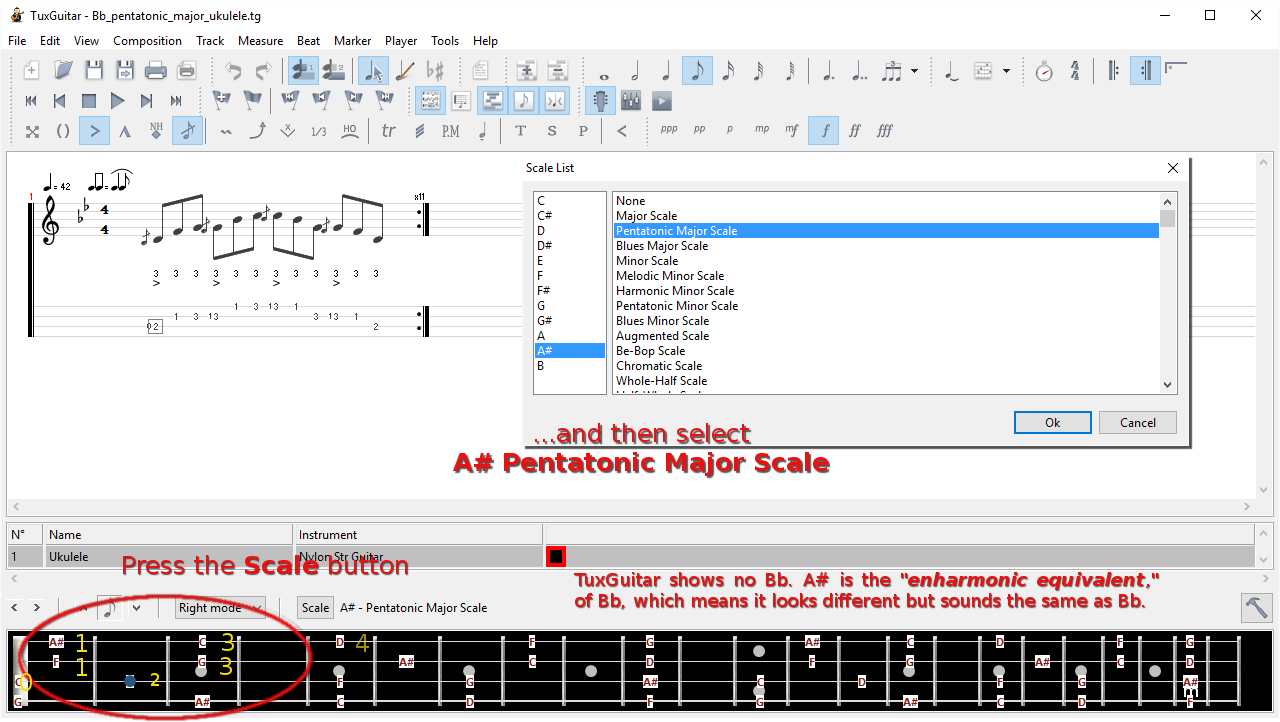
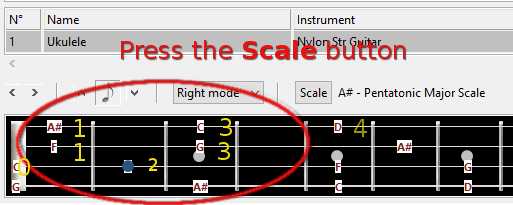
  3. [TuxGuitar (*.tg) file] Teach scale and fingering…
    Hand position… keep thumb behind, hand cupped; hammer on
    “Blues Major” and “Pentatonic Major” are different… how?

    image, notation and tab for lesson
    Fingering

    image, notation and tab for lesson

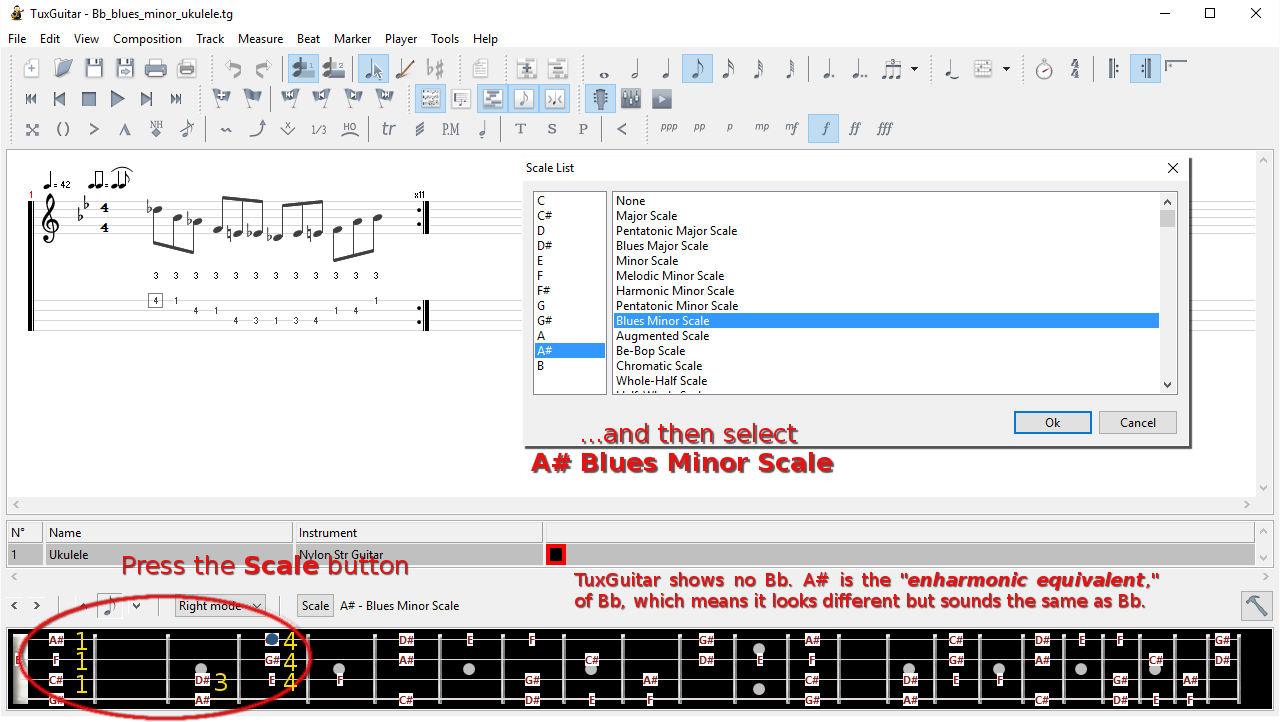
  4. [TuxGuitar (*.tg) file] Teach scale and fingering…
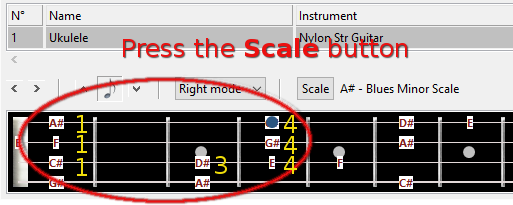
    Hand position… keep thumb behind, hand cupped, pinky hovers over frets
    “Blues Minor” and “Pentatonic Minor” are different… how?

    image, notation and tab for lesson
    Fingering

    image, notation and tab for lesson

Those are nearby, convenient Bb major and minor pentatonic scale patterns that form a perfect segue into ‘TuxUkulele.’

On the SMART board

(keep this short, unless everyone has a computer with TuxGuitar on it)

  1. Launch TuxGuitar, then open ukelele template
  2. Add swing; tempo <= 60; key Bb 
    • Opportunity to show conducting pattern  
  3. Show scale; play 1st position pattern (2 notes/string) for and with the learners 
  4. Show notes;
  5. Show chord symbols;
    • Opportunity to use conducting pattern  
  6. Repeat for lick (if time and engagement allow)

Back in the real world

  1. turn off software (or use purely as metronome)
  2. listening time
    • Robert Johnson Crossroad Blues [Show lyrics]
    • Charlie Patton 34 Blues [Show lyrics]
    • Howlin’ Wolf Killing Floor [Show lyrics] Is this still “swing feel?” (“straight 8ths”)
  3. Identify lyric pattern, 2+1 form
  4. play, student conductors, etc.
  5. Easy Tux Blues, (using tritone relationship) [TuxGuitar (*.tg) file]

§

Resources

How to read music – Tim Hansen [TEDEd Lesson]


Aug 04

Import 3D models into HitFilm Ultimate

Educators have been intrigued by the potential of 3D worlds to engage young learners almost since the idea of virtual worlds emerged on the internet wish lists of the early WWW. I first learned of “immersive 3d” and several projects based on the Open Cobalt platform in about 2008, and I investigated Sloodle, of which all that now remains is the Git repository. When the SMARTboard-friendly Open Cobalt flavour “EduSIM” announced you could import 3D objects from Google Earth I got very excited. I loved models as a kid, and the Google 3d Warehouse was an instant hit, even in its early days.

I soon found a model of the Kabul Museum, which some of you may know was destroyed by the Taliban but later rebuilt. I created a learning activity that was basically a scavenger hunt for images of other historical objects, which it was possible to retrieve from elsewhere in the virtual world and “hang” in rooms within the museum. Great fun and potentially educational—when it worked—but it flopped due to technical difficulties. Immersive 3D was intriguing, yes, but also time intensive, technologically challenging and, for teachers in the classroom, too much work: “…it is not clear that the investment in time in building and using the Virtual World is worth it” (Conole, 2014). Are there other ways to leverage the intrigue models, even virtual ones, hold for many people?

Film making as digital storytelling

Are aspiring filmmakers nearly as ubiquitous as the cellphone cameras they may be using to get their start? I’ve seen some evidence there are a lot of them, and it’s certainly arguable that multimedia communication is a literacy, maybe an entire set of literacies, important to develop in our digital era.

Are aspiring filmmakers nearly as ubiquitous as the cellphone cameras they may be using to get their start? I’ve seen some evidence there are a lot of them, and it’s certainly arguable that multimedia communication is a literacy, maybe an entire set of literacies, important to develop in our digital era. It may not be necessary or desirable to have everyone in the class “make a video,” but if you have an idea as to how a videographer or three could contribute to an emerging student-driven inquiry, seeking out local experts at the student level might be just the thing—maybe creating an opportunity for student and teacher to reverse roles.

Start with Google Sketchup

For Sketchup users, says Google, “…drawing is thinking. They draw to explore ideas, to figure things out, to show other people what they mean. They draw because they love it, and because nothing great was ever built that didn’t start with a great drawing.” Making thinking visible is what the best instructors do. They call Sketchup “The easiest way to draw in 3D, and from my limited experience that may well be true. The 3d Warehouse is a repository of models in many categories.

Sketchup can export 3D models as AutoCAD, Collada and several other popular 3D file formats, of which HitFilm Ultimate imports 3. I had the most success with 3-D Studio (*.3ds) files.

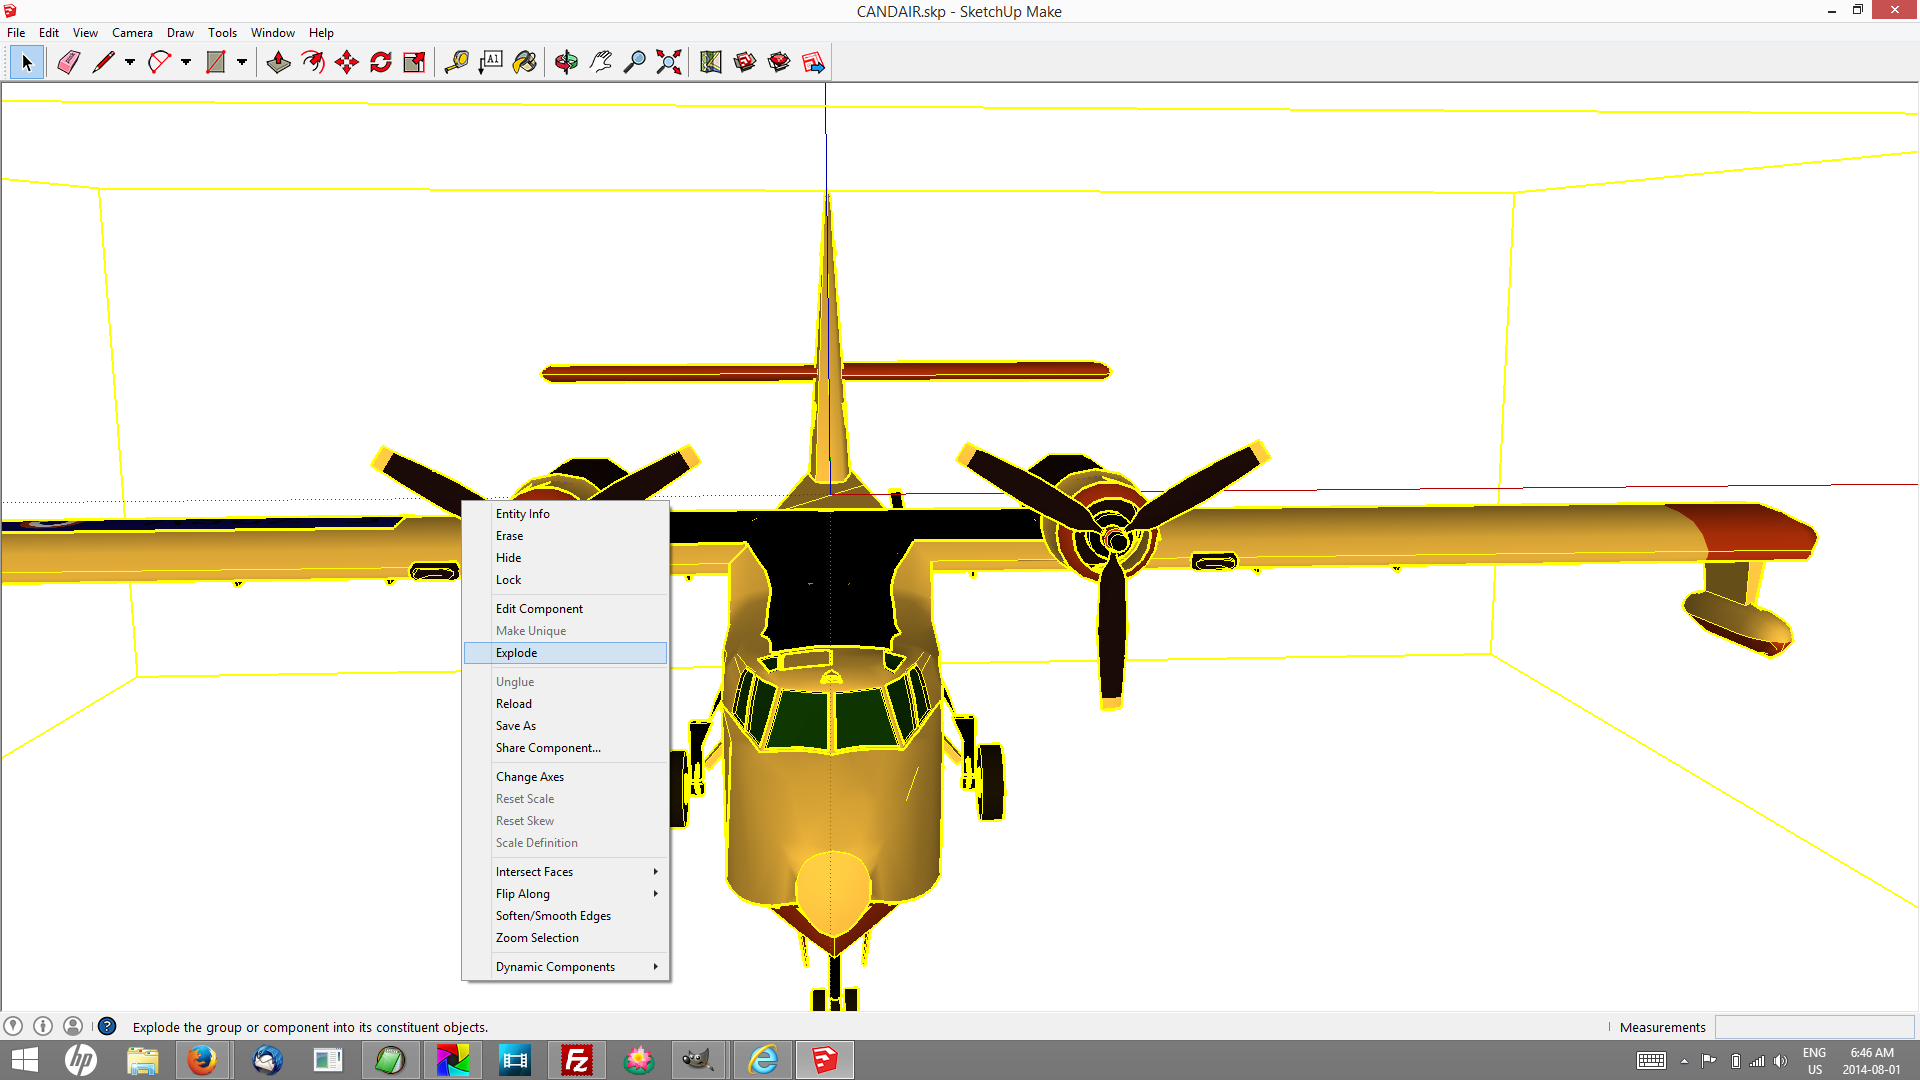
Step 1. Explode any groups you want to animate. Before I could select the propellor I needed to “explode” the entire model.

Screenshot Sketchup

Model: FRANCE CANDAIR by XALOC-SOLARIS selected… then Right-click → Explode

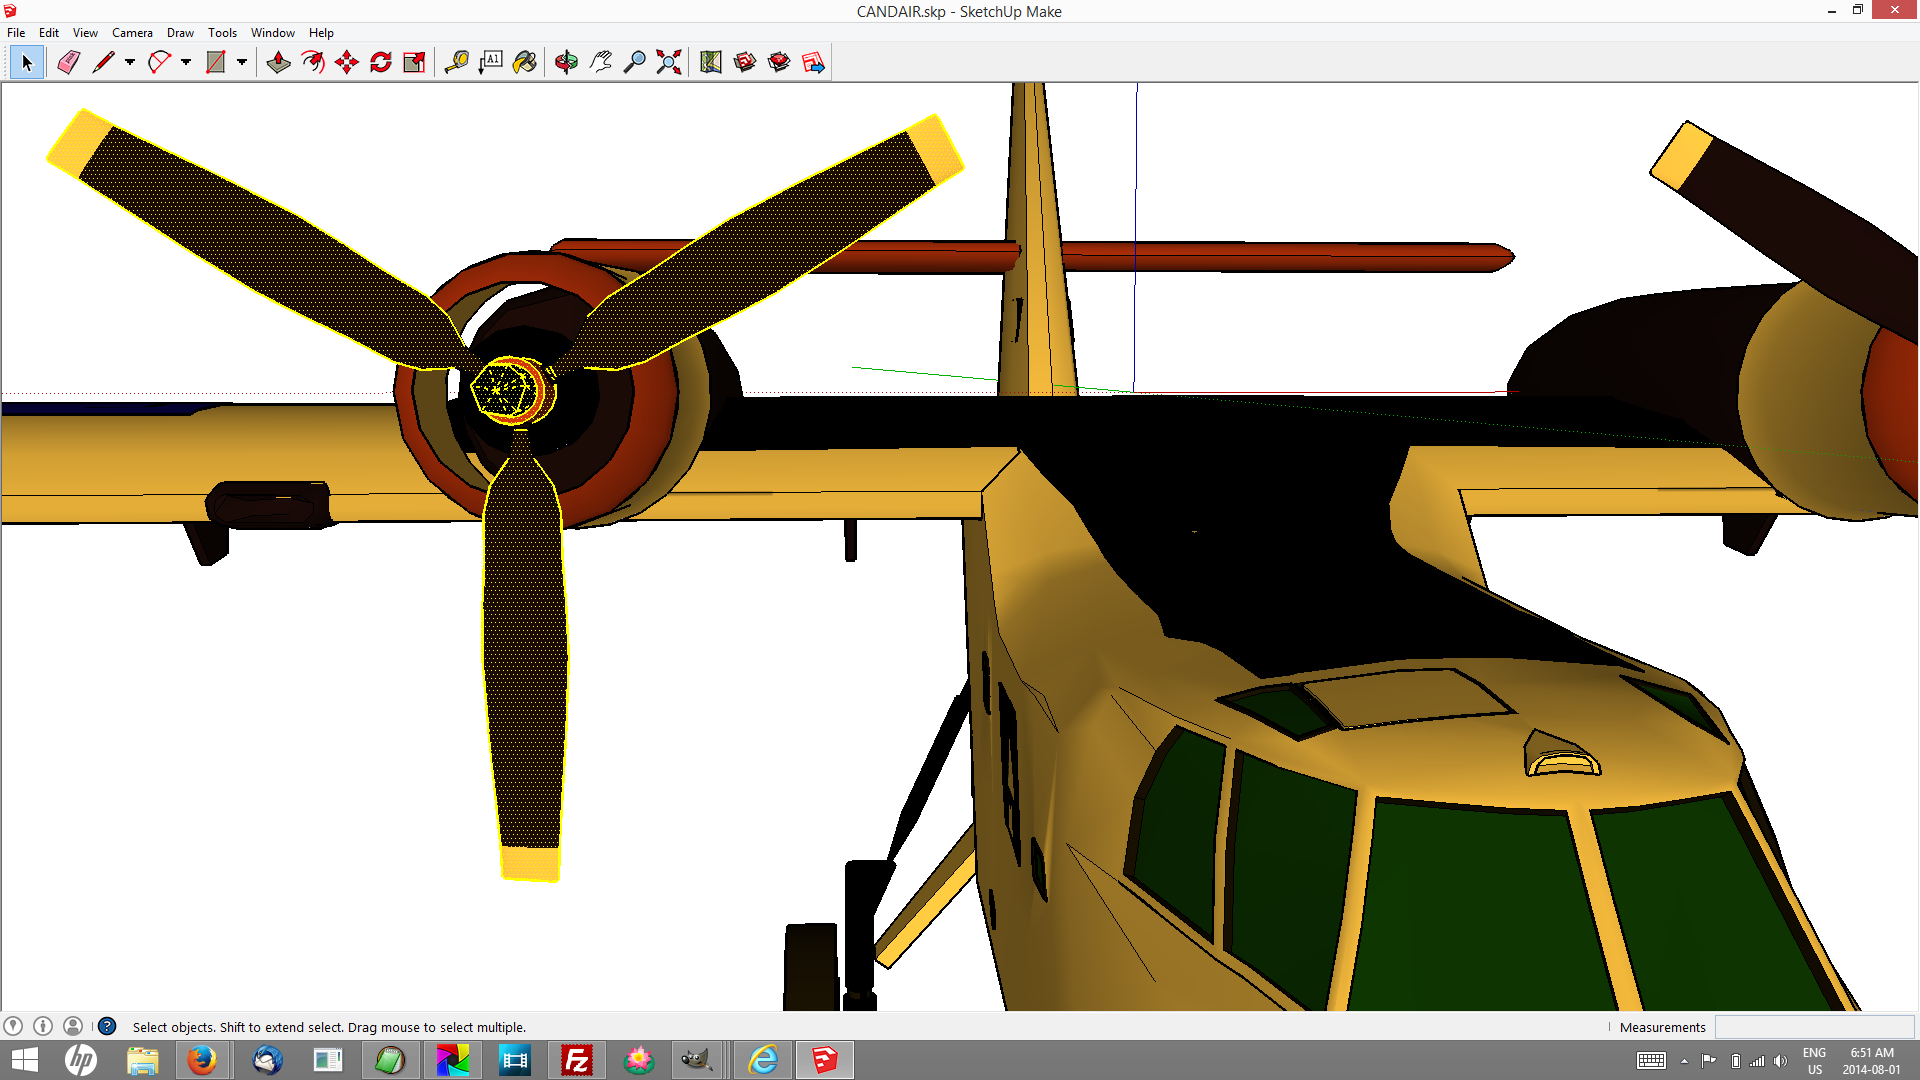
Step 2. Select the things you want to animate. Ctrl+DblClick to add entire objects (will make sense when you try it.)

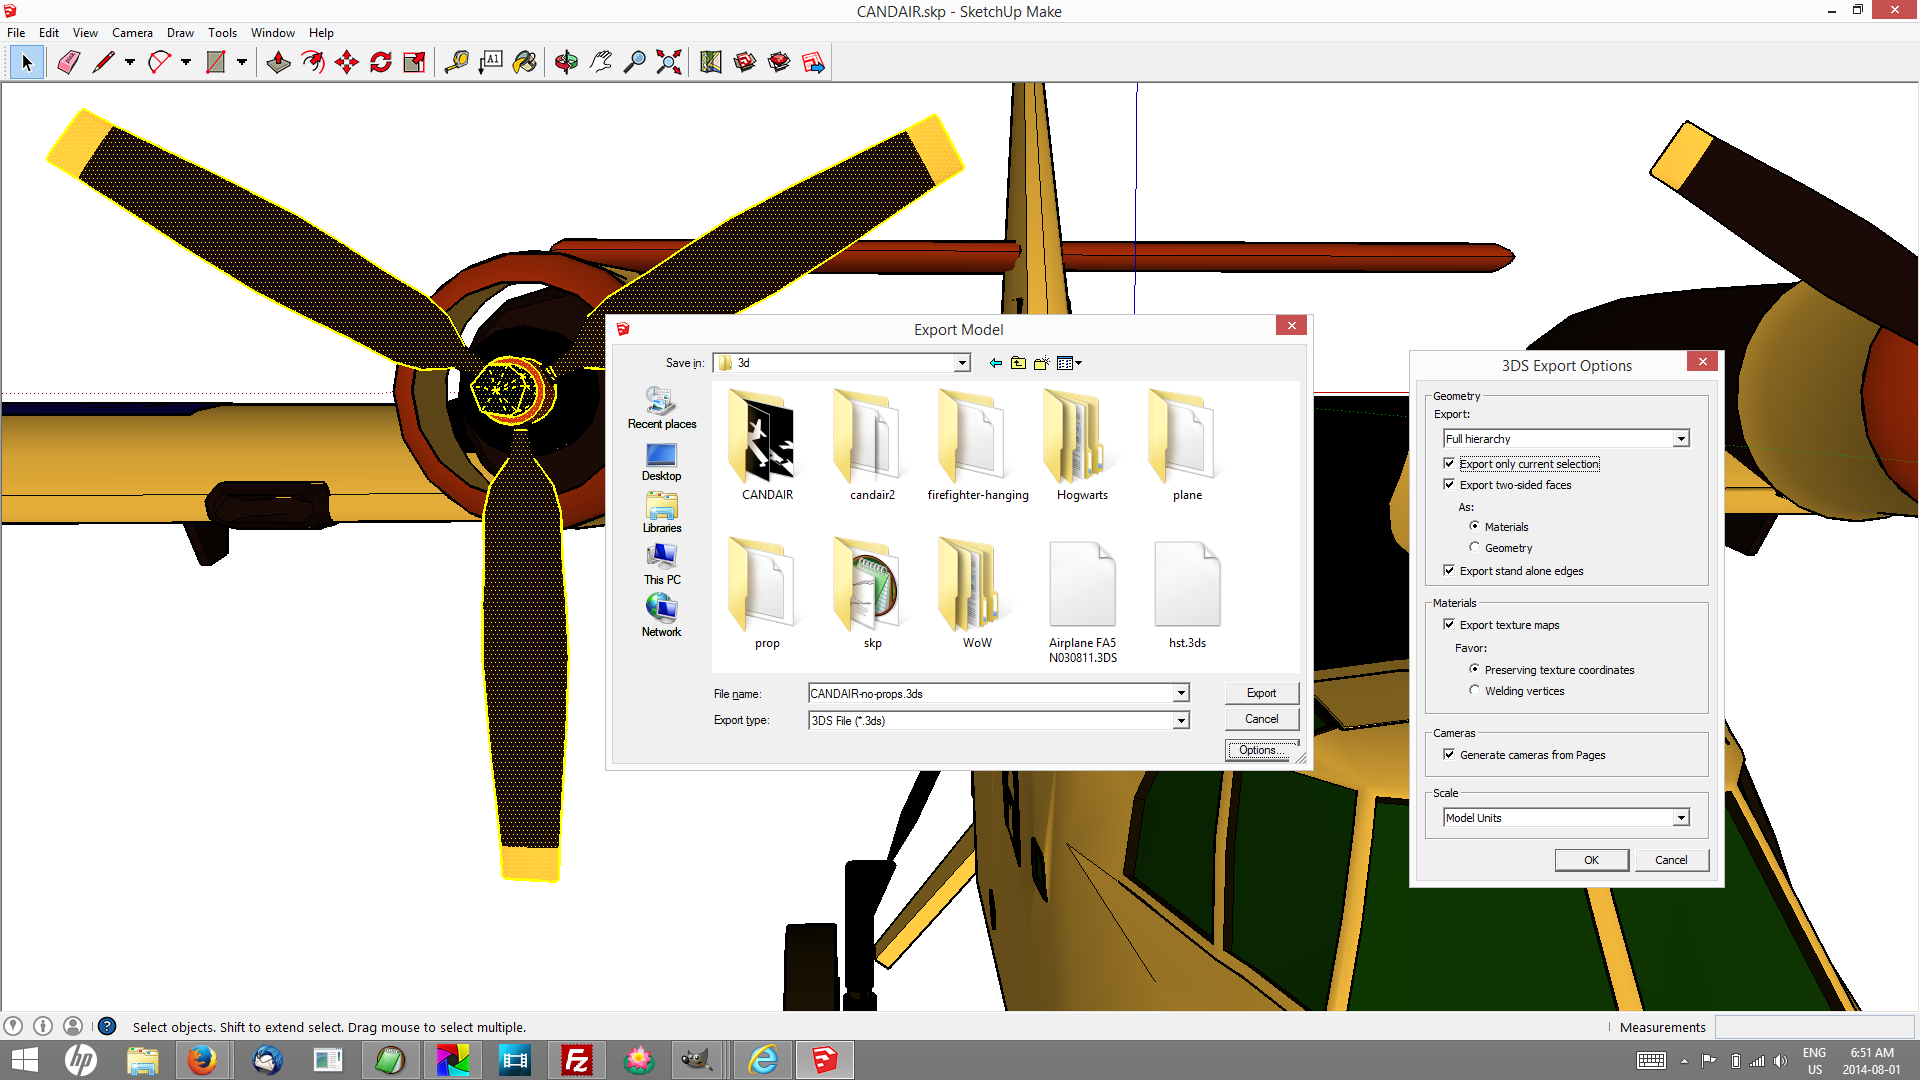
Step 3. Export in a useful format. I had best results with 3DS, but I soon learned to create a folder for every model I want to work with. Some of the other formats do this for you, because if your model is in the least bit complex it will generate many image files, and with 3d Studio files they all end up in the folder you save the master .3ds file. Press Options and check Export only current selection.

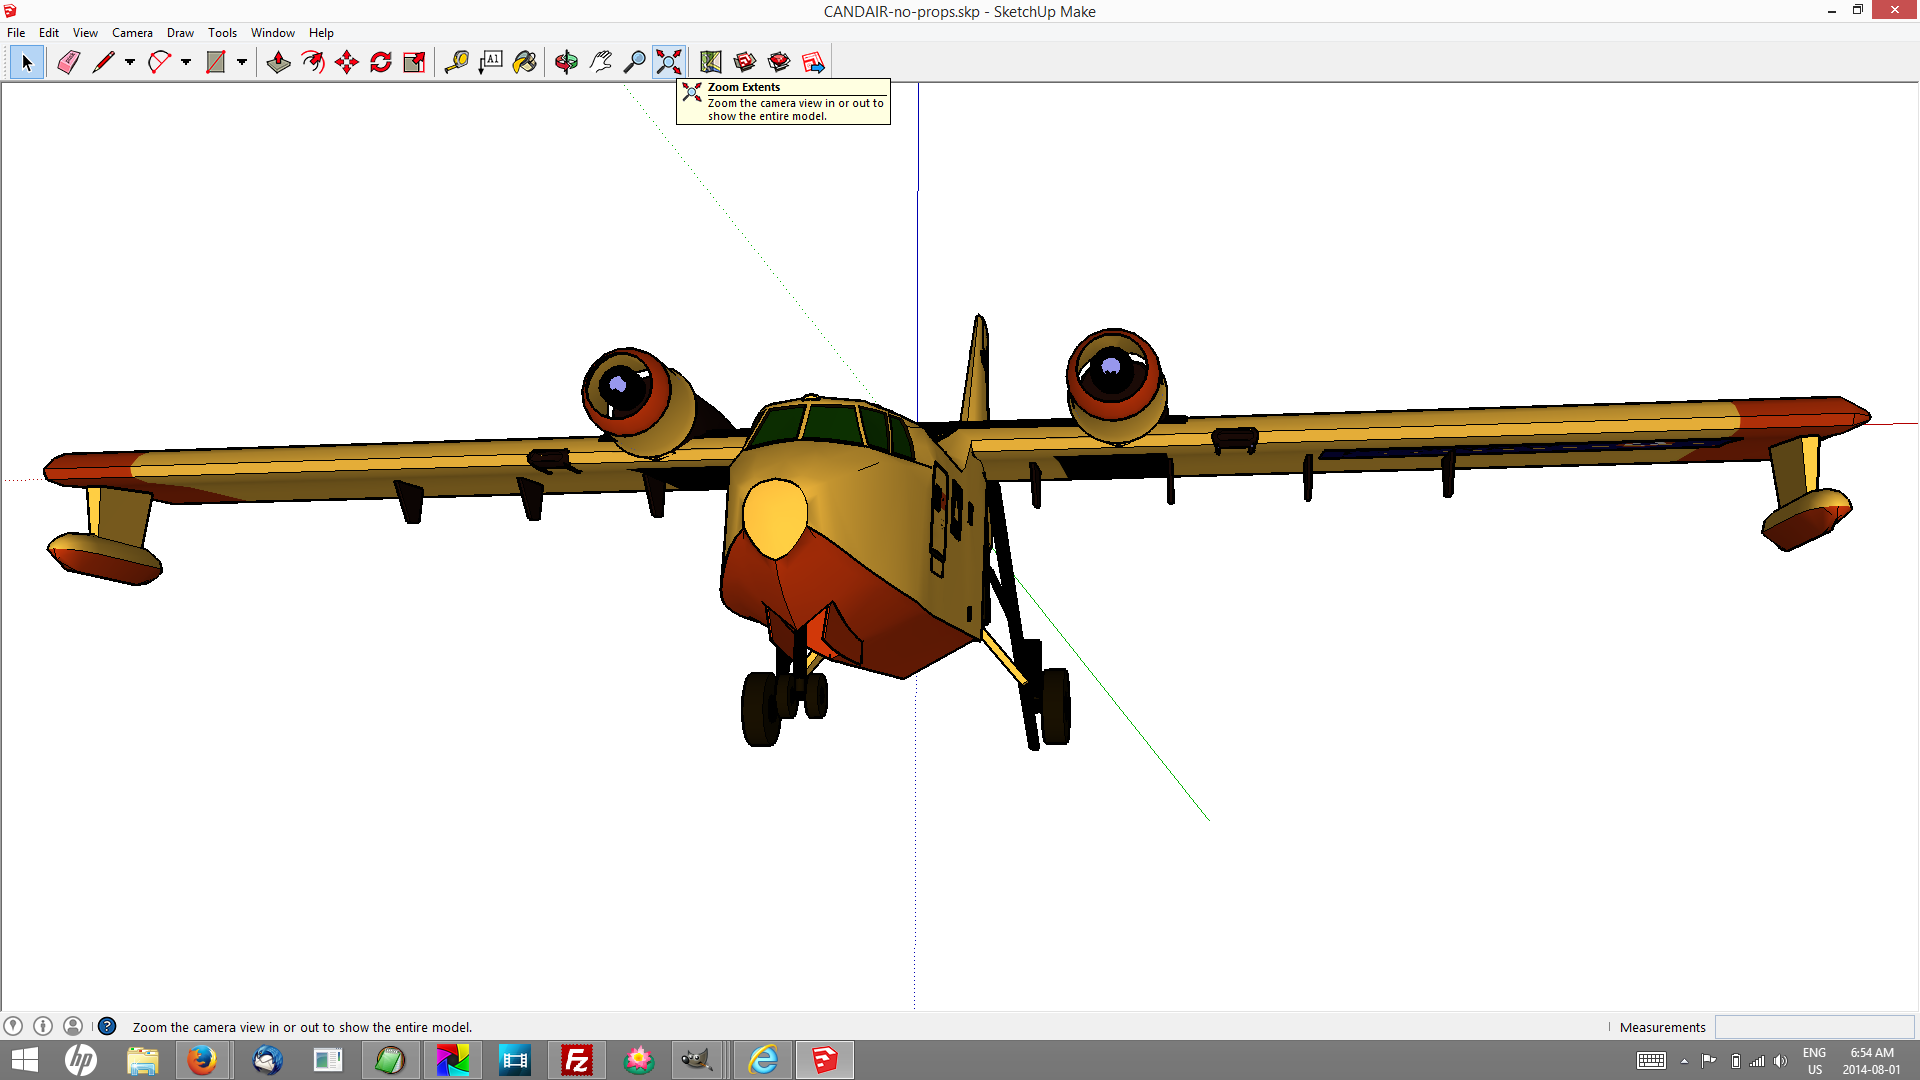
Step 4. Export other parts of the model.

HitFilm bundled with Sony MovieStudio

To import 3D models you need HitFilm Ultimate, which costs money. Sadly, in many places that creates a barrier. If that’s your situation don’t give up! Install Sketchup anyway, explore the 3D Warehouse and watch the tutorial entitled “Use Scenes to save important views” which is advertised from the splash screen when you start Sketchup. Read this, and turn kids loose, let them teach you how to use Sketchup to make animations and then use whatever editing software you may have access to (iMovie? Windows MovieMaker?) to put them together in meaningful sequences. You can still use green screens place themselves right in the action.

I was introduced first to HitFilm 2 Express, which does not do 3d, and came bundled with Sony MovieStudio Platinum, essentially buy-one-get-one-free. I found the $150 very reasonable considering what the two can do together, and within several months I was offered an upgrade deal too good to pass up — 70% off the full cost of Ultimate. The Sony is far and away the better editor and renders movies on average 3 times faster than HitFilm, but unless you can spring for top-of-the-line Vegas you’ll still need HitFilm’s compositing tools and effects, not to mention text styling and animation. If you use a green screen (and you will) you’ll especially need the masking tool.

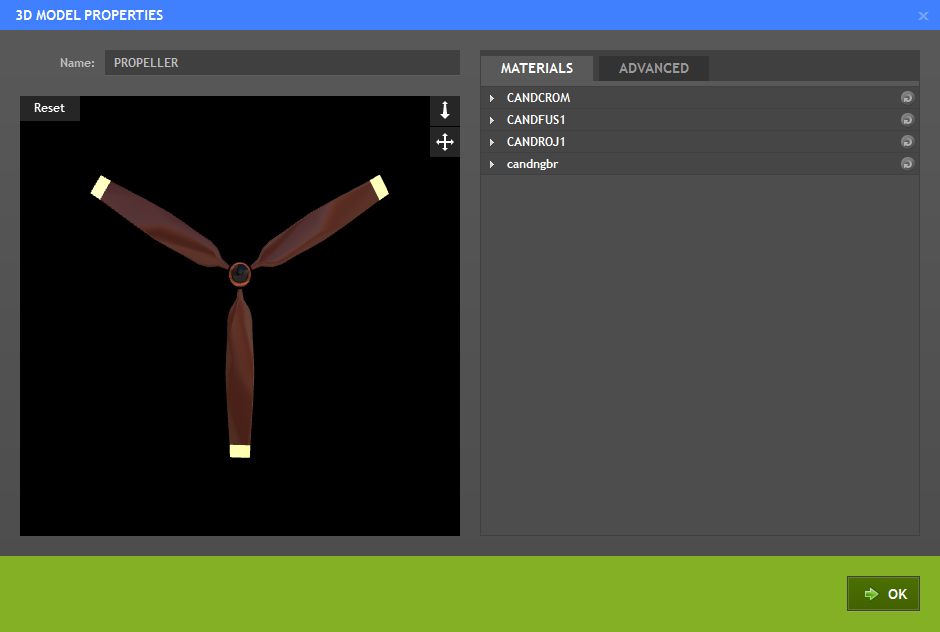
You’ll find [3D Model] on the media import dropdown menu. It analyses the model file and then displays what it found in a 3D Model Properties dialogue.

image of 3d import screen showing propeller

Propeller extracted from Model: FRANCE CANDAIR by XALOC-SOLARIS. HitFilm Ultimate offers an opportunity to tweak the “materials” of each piece of the 3d object.

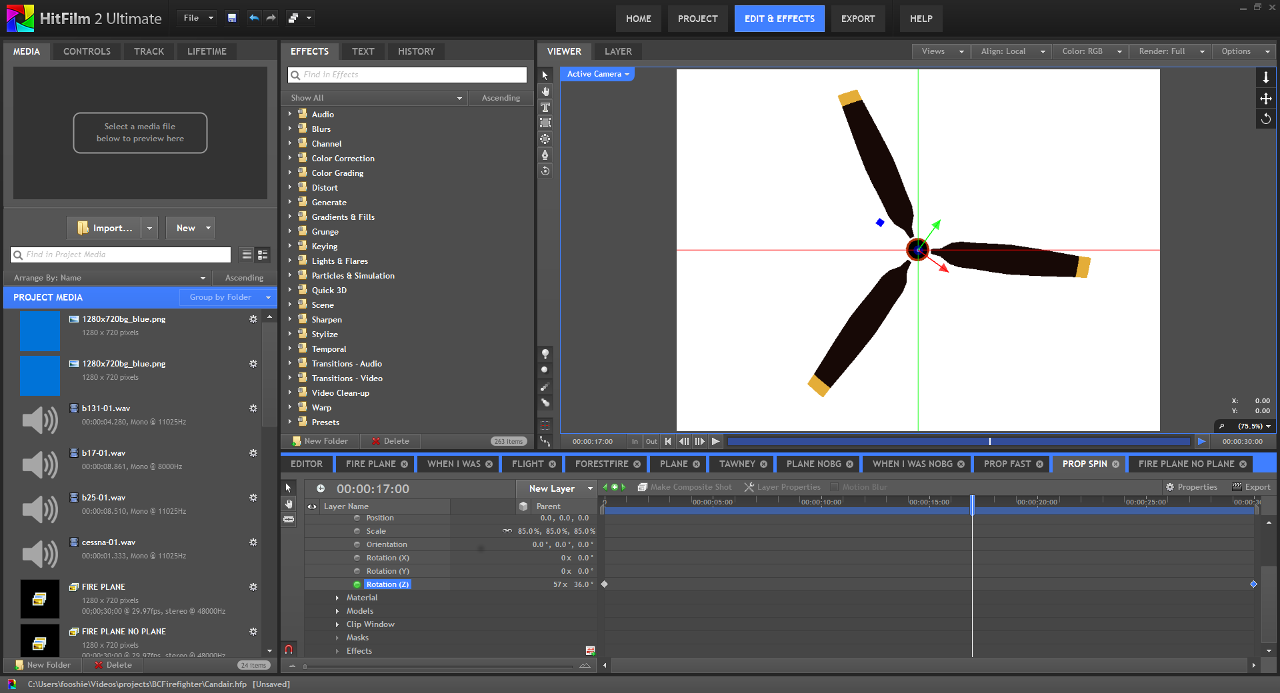
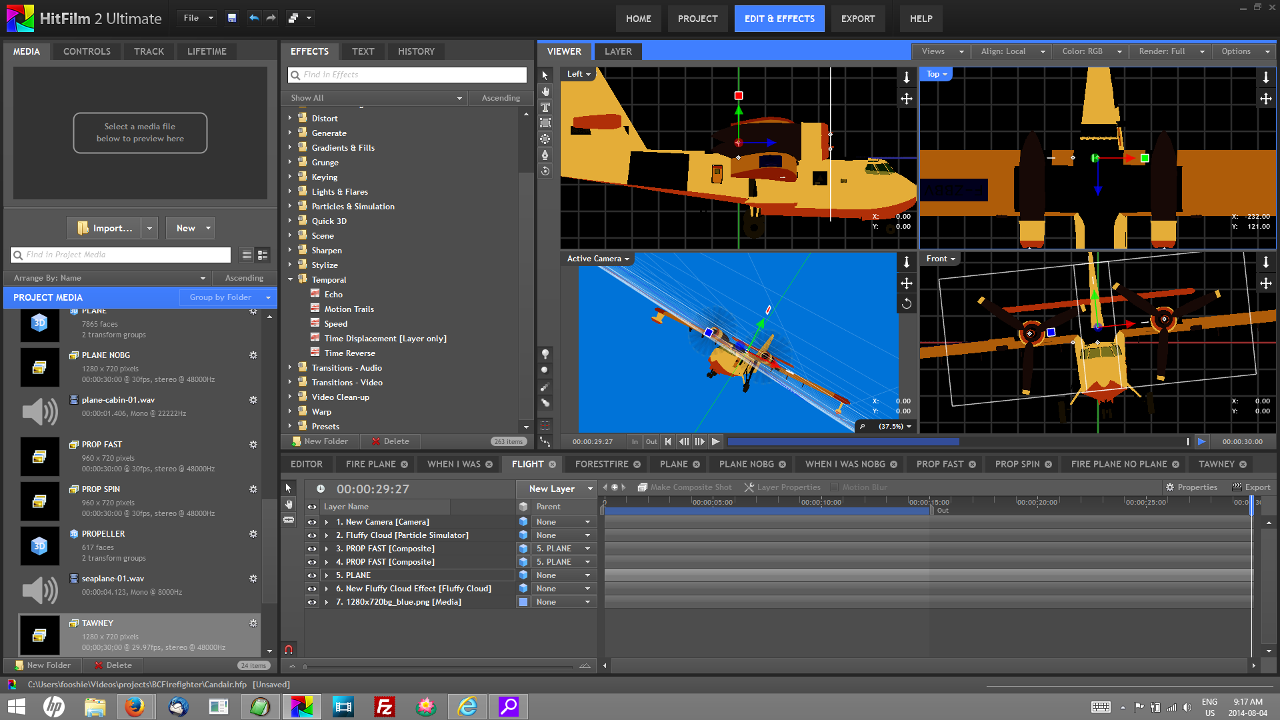
Animating literally dozens of available parameters is straightforward, designating a “parent” layer and attaching “child” layers only slightly more difficult (‘cartoonish’ is just fine with me for now!) Sticking to scale, position, orientation, transparency and zoom are probably more than enough to have some fun creating your own 3d worlds.

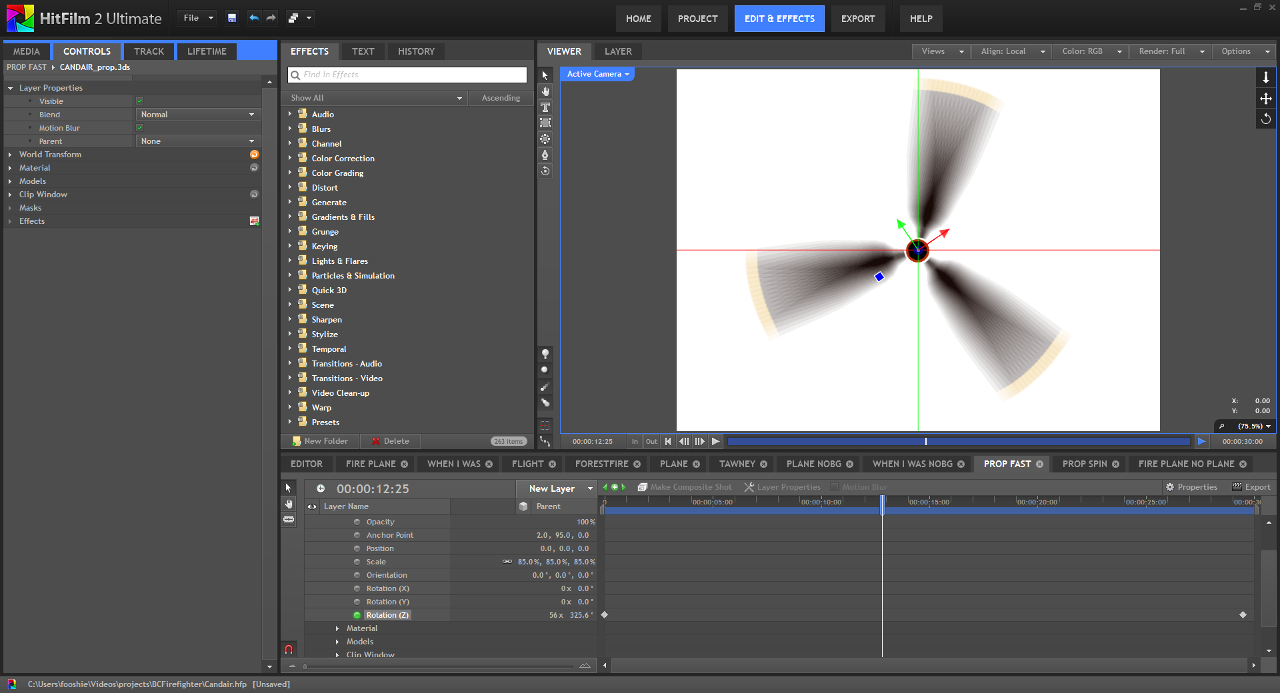
I duplicated the propeller composite and tried some other effects

Putting Humpty together again was a challenge at first, and in the end I think a reasonably good way to get started learning HitFilm’s layers, views and tools.

The way compositing works, this project isn’t necessarily a wrap when you render the day’s creativity. I can spend some time on the script, bring in actors and create variations on “the cargo bay scene,” and when I return to render the “fly by” it will have updated.

The airplane engine came from the repository at www.mediacollege.com.

§

Further reading

Talking Points: Immersive Education Initiative [PDF] from the Immersive Education Initiative

May 20

Dynamic duo: delineating divergence with SimpleMind! & FreeMind

Image of a mind map created with Freemind.There are literally hundreds of mind mapping programs available. When I wrote about the need for 21st century collaborators to consider the ways divergent and linear thinking interact when planning and executing strategy, and suggested mind mapping software as an apt strategic planning tool, I said you can always place map nodes in a line if you want to be linear. I hadn’t yet discovered that there are mind mapping tools that will attempt to do this for you. It was the purchase of SimpleMind! for my iPhone that alerted me to the uniqueness of FreeMind.

Screenshot SimpleMind! app

SimpleMind! is available on the iTunes and Android stores.

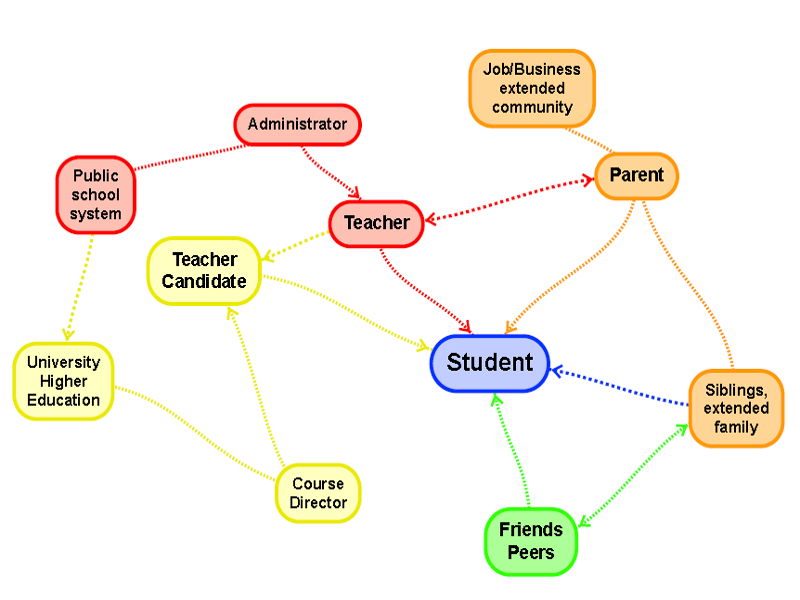
SimpleMind! for iOS has the ability to send the map you create by email in a number of useful formats, including FreeMind (*.mm). I must admit, I had installed FreeMind and opened it only once. All I saw was what looked to me like an immature open-source interface1. But I never bothered to uninstall it, so when I checked off one of everything and clicked the .mm file SimpleMind! sent me, I really didn’t know what to expect. While on the subway, using SimpleMind! on my iPhone I sketched out a map of what “student-centred” might look like in the context of teacher education. The PDF is identical to what SimpleMind! showed on my iPhone. Hover over it, or tap-hold, to see the FreeMind version.

Student centred: student’s at centre of exactly what?

What opened looked like an attempt to take my multi linked mind map and convert it to a more linear display. The places where it failed were, by no coincidence as it turns out, parts of my map where I already questioned my links, or felt unsure of relationships. Seeing the more linear map actually helped me revise and improve upon my original idea.

Unfortunately there are connections I drew between nodes in SimpleMind! that didn’t translate to FreeMind2. I think this supports my idea that maps capture relationships that may challenge simple lists, but also that linear thinking can aid the divergent thinker by supplying order and focus. Linear thinkers can lose sight of the centre; divergents sometimes forget where to begin.

Download Freemind from SourceForge.
SimpleMind! is available for iOS and Android in a limited free version, upgradable at a very reasonable price.

The Visual Thinking Center

§

  1. Earlier this month I discovered XMind, a well-developed open source mind-mapper I might describe as ‘Freemind on steroids.’ I’ve already found it very effective for planning and then creating a static list for management. I hope to find time to blog it soon.
  2. XMind handles the worst of these shortcomings by noting the linked nodes “See also:”
Jan 18

CompendiumLD for Learning Design

When the Open University funded the Learning Design Initiative in 2007 they asked about 4 specific aspects of the topic: efficiency & effectiveness of time spent designing learning; ways to represent innovative practice; access and availability of quality support for designers; the true nature of a quality design as it appears or presents in practice. With the continued support of Jisc they’ve produced a range of tools. When the OULDI picked an open source code base on which to build a collaboration-friendly tool to visually represent “a learning design” they “…considered various drawing packages, as well as more specialised mind mapping tools (such as Inspiration and MindManager).

Please note
Your browser can not display SVG so you will not see the interactive vmap that should be shown here.

To see the interactive map, please use a browser which displays SVG, e.g. Chrome, Firefox, Opera, Safari or Internet Explorer 9 and above.
Thank you.

In the end we choose to use Compendium, a visual representation tool, originally developed for enabling group argumentation…” (OU Website).

Compendium was already the Open University’s home-grown product. They set about adapting it specifically to the requirements of learning design, and they named it CompendiumLD. Learning Design is and evolution of traditional and established “instructional design” that provides a more holistic approach (Conole, 2014). Their tool truly does offer a “…range of flexible approaches to the design process,” the interactive SVG to the right, if you’re able to see and use it, is only one example, a “Sequence Map View.” Scalable Vector Graphics (SVG) is an XML-based vector image format for graphics that supports interactivity and animation (Wikipedia). If you’re getting JavaScript alert popup message when you mouse over blame them, not me!

Learning Design emerged “as a counter measure to Instructional Design. Driven primarily by researchers in Europe and Australia, Learning Design aimed to provide practitioners with guidance and support to inform their design process which is pedagogically effective and makes appropriate use of technologies. It is seen as a more encompassing term than Instructional Design, which operates primarily at the level of multimedia; in contrast Learning Design provides a holistic approach to the design process.
—Gráinne Colone, OULDI Project Lead (September 2008 – August 2011)

On the CompendiumLD corner of the Open University’s site you can also see a “Learning Outcomes View,” and a “Task Times View,” showing how you can use CompendiumLD to deliver timed assessments. For more advanced examples, see this Peer assessment using a wiki., or an example Modelling adaptations featuring open educational resources, “a design which shows how existing open educational resources can be included in an activity structure that caters for learners with different levels of skills and knowledge” created with a perhaps somewhat dated (<frameset>, <script Language="JavaScript1.2">) but nevertheless reliable and robust1 Web Export functionality that lets you share your designs with collaborators and other learners.

If there’s anything “wrong” with Compendium and CompendiumLD, you see it in these screen shots… is it perhaps a somewhat 90s, or turn-of-the-21st-century look to the icons? Never mind! Don’t let that distract you from what you can do with CompendiumLD. If it still bothers you, you can in fact change the images, icons and stencil sets, and it’s source is freely available — if you’d like to work on the interface the community will likely be grateful. Just look at CompendiumNG if you’ve any doubts there’s a next generation coming up in the Compendium family.

As part of the JISC Curriculum Design project (OULDI_JISC), four other [higher education] institutions (Brunel, Cambridge, London South Bank and Reading Universities) have been trialing and exploring the use of the OU learning design methodology. The purpose of these pilots is to determine the transferability of the OU methodology across a range of different HE organisations. In addition the pilots will provide the project with valuable feedback about the tools and resources developed as part of the OULDI-JISC project, and the approaches we have used to introduce and embed the methodologies institutionally (workshops, special interest groups and the toolbox etc). These Universities previously worked together as a cluster group for the HEA Pathfinder Project, on which Gráinne Conole was critical friend and it is expected that this work will build on, and extend on, that project.

I’ve had a strong sense of the value of these tools—and of the entire paradigm surrounding their development2 and use that seems to me so well-aligned with the long-established findings of cognitive apprenticeship—since they first came to my attention only a couple years ago. I’m truly excited to see their work expand and continue.

§

Further reading

Conole, Gráinne (2014) Reviewing the trajectories of e-learning, blogged chapter from forthcoming publication. Or start with my shorter overview

The Open University Learning Design Initiative “Our aim is to develop and implement a methodology for learning design composed of tools, practice and other innovation that both builds upon, and contributes to, existing academic and practitioner research. We have been working across several OU faculties and with 4 other universities to pilot curriculum design activities and relevant supporting tools and to contribute to the broader academic work in the subject.”

Jisc, “UK’s expert on digital technologies for education and research”

Fouchaux, Richard C. (2013), Thick learning situations: paths towards a framework for 21st-century learning design, project, paper and various web applications [HTML]
[…demonstrating, if not quite explaining, its own subthesis—the impending obsolescence of the traditional paper—and the work left to be done in utilizing new forms, and raising them to the status of other literacies! My MRP, the birth of this site. -rcf]
.


  1. By comparison, I discovered Visual Understanding Environment (VUE), a similar tool from Tufts University, has advanced as far as image maps enhanced with an early version of jQuery, but I found it very easy to break by putting HTML or the wrong text characters into the Node Notes.
  2. Back in 2011 I tried to say it in 10 seconds, but it took me 11, and maybe it’s not entirely clear I’m talking about the same issues. What do you think? [video]

§

Jan 15

Overview of Gráinne Conole’s “trajectories of e-learning”

Reviewing the trajectories of e-learning – Gráinne Conole

Gráinne Conole is Professor of Learning Innovation and Director of the Institute of Learning Innovation at the University of Leicester. Her work into applications of technology in learning is trailblazing and prolific (e.g., Conole & Fill, 2005; Conole, and Alevizou, 2010; ISC report JISC 2011; Conole, 2011; Conole, 2013). In this chapter from a forthcoming book that she posted to her blog today she summarizes the state of the art very well, however you may find as blogs go, it’s still a long read. Here’s an overview. I hope it’s of interest and you’ll visit her site to read the entire thing.

Professor Conole stresses The growing importance of ICT in education and quotes from a UNESCO 2005 report that saw 7 applications of technology in learning:

  1. to improve administrative efficiency and provide a pan-institutional infrastructure for managing learning, teaching and research.
  2. to disseminate teaching and learning materials to teachers and students, usually through an LMS and resource repositories.
  3. to improve the ICT skills of teachers and students and their digital literacies and competences
  4. to allow teachers and students access to sources of information from around the world.
  5. as examples of good practice and mechanisms for sharing ideas on education and learning.
  6. provide spaces for academics and students to collaborate on joint projects. These can also be used to support collaboration for research projects.
  7. to conduct lessons from remote locations and support distance learning. This can include both synchronous and asynchronous communication.

She provides a timeline of technology’s application “…from being a peripheral innovation to being part of the core services we offer learners. Each item on the timeline is discussed in turn.

Graphic, Figure 1: The e-learning timeline, source: Conole, 2014, blog

Figure 1 shows the e-learning timeline the chapter is based on. Professor Conole discusses each of the key technological developments that have arisen over the past thirty years

Professor Conole talks about the evolution of Multimedia Authoring Tools (like Adobe Captivate and others), The Web, “Learning Objects” (which are not the equivalent of “eLearning modules,” but “precursors to the Open Educational Resource (OER) movement”), and Learning Management Systems:

Graphic, Figure 2: Components of an institutional LMS, source: Conole, 2014, blog

Figure 2: Components of an institutional LMS
LMSs provide a hub for learning materials and course delivery and often also cover the management of course registration, course scheduling, discussion forums, blog sites, student scores, and student transcripts. LMSs contain a number of tools for presenting learning materials, for communication and collaboration and for managing assignments.

Professor Conole says Mobile Devices are gaining traction because they can be “used across different learning spaces, beyond the formal classroom setting, into the home and within informal learning contexts, such as museums.” And they are.

This very important distinction is highlighted in Professor Conole’s overview:

Learning Design emerged “as a counter measure to Instructional Design. Driven primarily by researchers in Europe and Australia, Learning Design aimed to provide practitioners with guidance and support to inform their design process which is pedagogically effective and makes appropriate use of technologies. It is seen as a more encompassing term than Instructional Design, which operates primarily at the level of multimedia; in contrast Learning Design provides a holistic approach to the design process.

Gamification is an immensely important trend “as a means of motivation and learner engagement” and Conole quotes Gee, 2008: “The potential of gamification, however, goes beyond promoting healthy lifestyles and marketing strategies. Gamers voluntarily invest countless hours in developing their problem-solving skills within the context of games” and says 21st century learning will reflect Gee’s ‘situated and embodied learning,’ “…meaning a student is not just being taught inert knowledge, rather using facts and information as tools for problem solving in a specific context and solving the problem (Gee 2011).”

[The Open Educational Resources (OER) is] …promoted by organisations such as UNSESCO and the William and Flora Hewlett Foundation. UNESCO argues that Education is a fundamental human right and therefore educational resources should be freely available.” She concludes this section “The OER movement has been successful in promoting the idea that knowledge is a public good, expanding the aspirations of organisations and individuals to publish OER. However as yet the potential of OER to transform practice has not being realised, there is a need for innovative forms of support on the creation and evaluation of OER” noting strongly that Hewlett Foundation, Atkins et al. (2007) said “adopt programs and policies to promote Open Educational Resources” is one of the five higher-level recommendations in the conclusion to the report.

Learning occurs wherever Social and participatory media appears (quality and scope of learning varies greatly). Conole draws from her prior work (Conole and Alevizou, 2010) “a review of the use of social and participatory media in Higher Education. [the authors] adapted a taxonomy of types of Web 2.0 tools (O’Reilly 2005) developed by Crook et al. (2008) based on the functionality of different tools.” She then lists 10 tool types, 3 trends and 5 characteristics—Peer critiquing, User-generated content, Collective aggregation, Community formation, Digital personas —that we can expect to continue into the 21st century.

She discusses the initial excitement around Virtual worlds, something I was also once very excited about, about which I came to the same conclusion: “Part of the problem is in the fact that the current Virtual Worlds are still difficult to use and part of the problem is that there are not many learning interventions where other technologies can be just as appropriate, i.e. it is not clear that the investment in time in building and using the Virtual World is worth it.”

The remainder of the article is devoted to the growing role and importance of E-books and smart devices, Massive Open Online Courses (MOOCs), arguing effectively for an alternative classification system based on 12 dimensions, and the emergence of Learning Analytics—data collection and its uses.

Professor Gráinne Conole wraps up her review of the key technological developments of the last 30 years with advice on what to look out for in the months and years ahead, where to look, and the following ideas and assertions:

To conclude, the nature of learning, teaching and research is changing as a result of the increasing impact of technologies in education. We are seeing changing roles and evolving organisation structures. In addition, disruptive technologies, like MOOCs, are challenging traditional educational business models and new models are emerging. We need to think beyond the distinction of campus-based and online learning, to focus more on the notion of Technology-Enhanced learning spaces.[41] We cannot as individuals or institutions afford to ignore technologies, we need to harness the characteristics of new media and adopt more open practices in our learning, teaching and research.
– Gráinne Conole

I first learned of professor Conole’s work in graduate school while doing a major research project, when charting a path from cognitive apprenticeship to design research took me through the realm of Compendium.

If you’re interested in these things, I highly recommend the entire piece. Reviewing the trajectories of e-learning

§

Professor Gráinne Conole, Professor of Learning Innovation
Director, Institute of Learning Innovation, School of Education, University of Leicester

Nov 24

JavaScript the least of (my) hurdles with MIDI.js

On #musedchat Monday Nov 18 I saw an opportunity to mention an open source Scoring/Engraving tool and was soon encouraged to send more links to open source resources. I’ve been collecting such links in the bookmarks of various browsers for years, and I’ve followed through on my initial interest to various degrees, so in some cases I found myself checking links along with my memory. In one case—MIDI.js—I said a big “Oh yeah! I was gonna try installing that, wasn’t I?”

How easy it is to try out any of the hundreds of thousands of interesting and potentially useful JavaScript offerings one can find on the Internet depends a lot on how much documentation the developer and interested community have provided and good examples of the code in (ahem) “authentic situations.” No matter how good it is, if you want it you’ll soon have to view source and dig in. The code behind MIDI.js looked to me daunting, but on closer inspection it turned out the biggest hurdle was recognizing the playlist of MIDI files is an array of Base64-encoded strings hard-coded in the file. If you know what that is, and if you can encode your MIDI file as a Base-64 string then copy/paste it over the ones in the original example—and if you set up the folder structure identically to the original (clone the Git repository straight into /xampp/htdocs if you work with a LAMP setup like mine)—it just works! But it looks just like the author’s.

The design is not responsive1 and doesn’t fit my blog or mobile device. The colours are very cool but I don’t need them. The note display has so many pedagogical applications my brain is exploding—but it doesn’t fit on my pages, same goes for the player and buttons. The JavaScript knowledge I need is “just enough” to identify where to safely slice and dice the code and recognize the very few places I might change something. It was more important I knew Base-64 encoding is something I’d likely find a web site to do. The highest-level skill needed here is actually CSS. I need to restyle the player so it fits my pages in the contexts I expect it to be viewed. And I want those notes to play along exactly as they do now, just in a completely different layout.

Here’s what it looks like today. (It’s not worth listening to in anything but Chrome).

An undefined error originally came from this line, but I haven’t found where MIDI.lang is supposed to be defined, and the sentence really doesn’t tell me anything I care to know if I define it as “English.” I made sure the page has a title and I even gave it a language attribute but no luck only by hard-coding it as shown below could I stop it so far. Will dig in [to the MIDI object, its properties and methods] later.

// I added...
// Quick suppression of undefined
MIDI.lang = MIDI.lang || 'en-ca';
/// above...
// this is the language we are running in
var title = document.getElementById("title");
title.innerHTML = "Sound being generated with &quot; + MIDI.lang + ".";
// I also added at line 108
pausePlayStop(true);  // Sorry Gasman. Autoplay is just wrong!
// Just above that I see <code>song[songid++%3]</code>, the '%3' implies something hard-coded that applied to the fact there used to be 3 midi files. To be continued... 
May 28

Make Captivate HTML5 Work in Firefox

screen shot of error dialogWith the slow but steady demise of Flash, SWF-based elearning software makers, like Adobe, have been “cramming” (a word from disruptive innovation) HTML5 into their products, like Captivate (I’m using v6.1), to keep up. Because the HTML5 spec itself is still growing in inconsistent and at times uncertain directions there are bound to be holes and gaps in the implementations. For Captivate 6.1 the first one I encountered was the “This browser does not support some of the content…” error I got when I attempted to view my HTML5 output in my browser of choice—Firefox. It was version 20, and I know Firefox has supported HTML5 audio and video tags since version 3.5 so it had to be something silly. In the proprietary software world that may mean license issues, and so it does with Firefox (Free, Open, Libre software) and the MP3 (not so much). Captivate exports only MP3s, Firefox (and Opera) play only OGGs. So until Adobe offers a checkbox on the Publishing page you can do the following, or hope your visitors use only IE, Safari or Chrome—as the majority probably do… but we’re big on inclusion around here so let’s not leave anyone out!

I quickly ascertained it’s the MP3-only audio export preventing Firefox from doing Captivate sound. As you probably know, some browsers do MP3, others do OGG. You may even remember why. Fortunately that’s the only reason Firefox won’t play Captivate HTML5. All you have to do are

  1. create OGG versions of each MP3 and
  2. edit two JavaScript files to
    1. detect Firefox
    2. provide the appropriate file extension and
    3. suppress the error message.

Simple enough you say, but I figured I may as well google it and see what others have done. I did, and found all the hints I needed in hermit9911’s answer to this post (scroll down a few). hermit just needs OGG. I want both to work depending on browser, so I had to improvise on hermit9911’s theme. Here are the steps I ended up following.

1. Create OGG versions of each MP3

There are many programs that convert audio formats. I used Audacity’s “Chains” feature (macros). Since I’ve met many more people who know of Audacity than know of its Chains feature, I’ve done a separate screencast of that process:

Made using Camstudio (screen video), iPhone (narration),
Audacity (mix/process audio) & Sony Vegas (mix/render video)
Can you suggest a good open source video editor? Please use the comments with my thanks!

2. Edit two JavaScript files

detect Firefox

Project.js is found in the root export folder. It’s “minified,” which means line breaks and extra spaces are removed and it’s pretty hard to read, but we can add our tiny bit of code right at the beginning. I don’t see any need for feature detection in this case, so I settled for user agent:

var is_firefox = navigator.userAgent.toLowerCase().indexOf('firefox') > -1; 
// converts the string to lowercase then creates Boolean, 
// true if it finds 'firefox' anywhere in the name. Otherwise : false 

provide the appropriate file extension

Once you have a question that can be answered yes or no the best syntax is usually as follows:

myExtension = is_firefox ? '.ogg' : 'mp3'; <br>// Yes? Send '.ogg' No : send '.mp3

Then just search & replace existing .mp3' with '+myExtension Everything between ”s is literal, myExtension is variable depending on the answer to is_firefox?yes:no;

UPDATED: If you have Administrator rights and access to the Adobe Captivate install folder you can add these changes to the template Captivate creates the file from. Otherwise both files are overwritten every time you publish, and you have to repeat all these steps. If you can access and edit
[InstallFolder]\HTML\assets\js\CPHTML5Warnings.js
use that file instead (path to install folder will differ depending on operating system and installation) otherwise follow the instructions as written:
Next, open [PublishFolder]/assets/CPHTML5Warnings.js and make the two additions suggested by hermit9911. (I looked up the earliest version of Firefox that supported the audio tag and replaced hermit9911’s xx with 3.5).

this.BrowserEnum.FIREFOX_MIN_SUPPORTED_VERSION = 3.5; // sets minimum version, used in code below

suppress the error message

Finally at the very bottom of the file you will find a series of IF and IF ELSE statements… add the following after the closing semicolon of the last one:

else if((this.browser == this.BrowserEnum.FIREFOX) <br>  &amp;&amp;<br> (this.browserVersion &gt;= this.BrowserEnum.FIREFOX_MIN_SUPPORTED_VERSION )) <br> lSupported = true;

Browse to index.html in Firefox, press Play and watch your movie. With a bit of practice this will add all of about 5-10 minutes to your publishing routine. Alas, you’ll have to redo Project.js—and convert all your audio files— every time you publish.

As an extension activity, make this work for Opera (yes, you can use find/replace but watch case-sensitivity. Do each separately… firefox/opera and FIREFOX/OPERA). Use flow control instead? (Hint: yes) Look back at the code above and explain why you need to do that. Would you change the variable name? To what?

My entire solution instructions and code snippets
(including my answers to the extension questions)

/* ADD TO TOP OF Project.js */
var wantsOggsOverEasy = ((navigator.userAgent.toLowerCase().indexOf('firefox') > -1) || (navigator.userAgent.toLowerCase().indexOf('opera') > -1)), myEXT=wantsOggsOverEasy?'.ogg':'.mp3'; 
/* nb comma/semi-colon usage - I declared 2 local vars in 1 dec */

/* This is the text to search for
   .mp3' and change it to '+myEXT
  EXAMPLE
  FROM: src:'ar/Mouse.mp3',du:182
       TO: src:'ar/Mouse'+myEXT,du:182

IF you have Admin privileges find the Captivate install folder and edit the warnings file found in
[InstallFolder]\HTML\assets\js\CPHTML5Warnings.js. Otherwise you can save these changes in a safe place and you'll need to replace [PublishFolder]/ar/CPHTML5Warnings.js in the published location every time you publish. (Project.js is generated programmatically by the publishing engine, so to the best of my knowledge it must be fixed after each publish, also protect your OGG files.)  */

/* In CPHTML5Warnings.js 
(somewhere between lines 19 and 20) non-destructively ADD:  */

        this.BrowserEnum.FIREFOX_MIN_SUPPORTED_VERSION = 3.5;
        this.BrowserEnum.OPERA_MIN_SUPPORTED_VERSION = 10;

(approximately line 112) AFTER final 
          lSupported = true; AND BEFORE

          return lSupported; non-destructively ADD 

		else if((this.browser == this.BrowserEnum.FIREFOX) && (this.browserVersion >= this.BrowserEnum.FIREFOX_MIN_SUPPORTED_VERSION))

            lSupported = true;	
		else if((this.browser == this.BrowserEnum.OPERA) && (this.browserVersion >= this.BrowserEnum.OPERA_MIN_SUPPORTED_VERSION))
            lSupported = true;

§

N.B. Post was edited for clarity since first publishing.