The “Web Content Accessibility Guidelines” (WCAG) 2.0 are the accessibility standard most new websites in Ontario and many other places around the world have to meet nowadays. Here’s a front end accessibility lesson that can show us a few things about applying WCAG 2.0, at a couple different levels. I’ll demonstrate a JavaScript solution to a specific problem, I’ll sort of ‘reverse engineer’ from that problem to locate where it sits within the framework of the four principles—that content must be Perceivable, Operable, Understandable, and Robust—and I’ll show how I use the WCAG 2.0 site to understand any accessibility issue—whom it affects, how, how to fix it, and how to know that I’ve done so successfully. As a bonus, I’ll pop over to the jQuery API site and look at the selector reference. I think the WordPress “hack” I show for adding this to your blog is out of date—the “Admired” theme I’m using now has a way better built-in method—so you’ll need to adapt it. No clue at all what I’m talking about? I didn’t learn this in school either… sometimes you just have to dig in and figure it out.
Understanding WCAG 2.0
Understanding… WCAG 2.0 means understanding that the work began as a collaborative effort to define the 4 Principles of an accessible internet site, which after a decade of ongoing consultation with an ever-growing international community are now guidelines—not exactly the same as “rules”—and a list of criteria—things front-end developers must, should, and can do—to succeed at removing the barriers some groups will otherwise face when accessing and using the internet. [It…] is not prescriptive, but offers options…
Understanding how to use the huge body of work we call WCAG 2.0 means understanding that the work began as a collaborative effort to define the 4 Principles of an accessible internet site, which after a decade of ongoing consultation with an ever-growing international community are now guidelines—not exactly the same as “rules”—and a list of criteria—things front-end developers must, should, and can do—to succeed at removing the barriers some groups will otherwise face when accessing and using the internet. Because the list is not prescriptive, but offers options, it seems of the utmost importance to first know your audience, and next, to understand as the Web Consortium’s Accessibility Group sets out in WCAG 2.0, the best way your organization can guarantee your audience access to your content.
David Berman said in his workshop, and I think it makes perfect sense, that the differences between accessibility and usability are, for all intents and purposes, purely semantic. Providing access for people with varying abilities, simply makes things more usable for everyone.
The specific problems I’ll address are, ‘opening too many new windows’ and ‘changing things without telling me.’ In order to keep site visitors from leaving a site, Web developers often open links in new windows, usually by using the target attribute, and by assigning it a value of "_blank":
<a href="http://SOME_LINK" target="_blank">Linked text</a>
WCAG 2.0 in a nutshell
As I said earlier, there are 4 Principles. Websites must be 1) perceivable, 2) operable, 3) understandable, and 4) robust. If you like acronyms: POUR some accessibility sugar on me (use <abbr title="Spelled Out">SO</abbr> to create tool tips screen readers can use)! Each principal has “guidelines, “…which are further categorized into levels. Level A must be done, or some group will not be able to access the content. Level AA should be done, or some group will have difficulty accessing the content. Level AAA can be done to improve usability or enhance accessibility further. Too many windows causes problems in understanding, which is principle #3. This can be especially challenging for those with disabilities related to vision or cognition.
The Understanding WCAG 2.0 site provides information by which to understand each guideline, and provides “success criteria” so you know when you’ve achieved each level, and examples of techniques you can use to get there. “Success criteria” are written as statements that are recognizably/measurably false until one meets the guidelines. The problems that prevent the statement from being true are your challenges to overcome.
Know your organization, your audience, and your content. Use valid HTML wherever you write code. If most of your site visitors are knowledgeable about technology it may not be necessary to open new windows, as they will use their familiar browsing setup to choose when and how to open them, and if your code is valid it will work as they expect. There’s no WCAG 2.0 guideline that says not to open new windows, but we must think more carefully about how doing so may create barriers to ease of access and use.
Guideline 3.2 says: make webpages appear and operate in predictable ways. Opening pop-up windows could be problematic for screen readers. If they don’t know the window is opening they can get lost. This guideline also covers many situations, such as focus or context changes, and page reloads—anything a user can potentially do that changes the content. WCAG 2.0 by no means prohibit pop-up windows, but we must prevent them from becoming barriers or annoyances. We should minimize the number of new windows, stop using target=”_blank”, and let users request a new window or otherwise inform them it’s about to open. If we look further in the Table of Contents we find a discussion about pop-ups under 3.2.5, with suggestions…
Situation C: If the Web page uses pop-up windows:
Including pop-up windows using one of the following techniques:
H83: Using the target attribute to open a new window on user request and indicating this in link text (HTML)
SCR24: Using progressive enhancement to open new windows on user request (Scripting)
3.2.5 also has an “Advisory” about additional techniques.
Additional Techniques (Advisory) for 3.2.5
Although not required for conformance, the following additional techniques should be considered in order to make content more accessible. Not all techniques can be used or would be effective in all situations.
Opening new windows by providing normal hyperlinks without the target attribute (future link), because many user agents allow users to open links in another window or tab.
G200: Opening new windows and tabs from a link only when necessary
Understanding the problem, we now make a plan
Objective
I don’t want folk leaving my pages abruptly or permanently, and I don’t think all my visitors know everything about their browser’s and other equipment’s context-sensitive help menus, access key options, etc., so I’ve elected to automatically open some content in new windows. I’ve decided I can sensibly limit the number of windows that open from any of my blog pages to a maximum of 2 by applying a simple self-enforced rule. I’ll still use the target attribute, but instead to create one “named window” for links to other areas of my site (rcfWin), and one “named window” for links to external sites (extWin). I’ll open all external links in their own window, which means I can easily design something that will apply retroactively to all such links. Go to the API selectors page and scroll down to Attribute Starts With Selector [name^="value"] to get the syntax. I want to select all the links (a) with an href attribute whose value begins with http:// (or https://). We can get away with [href^="http"].
I have to weigh all the advice to find the best way to handle my internal links. If you’ve linked text in the middle of one article to another article there’s a distinct chance the user will click it and start reading. If you don’t want that, the most sensible choice is usually to lose the link—link only at the end of the information and only to the next logical jump in a sequence. But if you feel you must have the option, to keep it as an available option you can create a CSS class name and tell jQuery to look for that. You’ll still have to add it manually to any links, past present or future, you want to behave that way. Or you could do it the other way around and use your class to prevent opening in another window or tab.
<a class="open-in-rcfWin" href="/MY_INTERNAL_LINK" target="rcfWin">Linked text</a>
<a href="http://SOME_EXTERNAL_LINK" target="extWin">Linked text</a>
* Aside: I’ve already manually removed the http://www.rcfouchaux.ca from internal links because of its effect on WordPress “pingback links,” which I’ve got going on here. I’ll have to explain those later, but it comes in handy that I’ve done this, as you’ll soon see.
Problem
This blog just turned 3, and I’ve got a lot of blog pages. I have to find some way to automate at least some of this. I might have used target="_blank" sometimes, and not others. I might have already used target="extWin".
jQuery to the rescue!
jQuery library—write less, do more
jQuery is a “library” of code that makes standard JavaScript easier to use by preparing commonly used patterns and tasks and giving them logical, easier-to-remember names. jQuery selectors let’s us find and select specific elements and groups of elements on a web page and then manipulate them in pretty astonishing ways. If your site is WordPress like this one you’ll have to find out if jQuery is already included in your theme, or if it can be added easily (or if you have admin access to your web root and know how you can add it to any web site). Due to historical reasons I combine methods. I let the Admired Theme supply the jQuery and I keep extras in my own file. To make it use the scripts in my file I need admin-level server access to edit my theme’s header.php, which is found in wp-content/themes/YOUR_THEME/. Find wp_head(); alone on its own line and add a line of code after it wp_enqueue_script( ALIAS, PATHTOFILENAME );. The path to the file has to be complete, should be a ‘relative’ path, and depends on your server. I always make the alias the first part of the filename.
<?php
	/* JavaScript for threaded comments.
	 ----------------------------------*/
	if ( is_singular() && get_option( 'thread_comments' ) )
		wp_enqueue_script( 'comment-reply' );

	/* wp_head() before closing </head> tag.
	---------------------------------------*/
	wp_head();

	/* Include own script(s) AFTER wp_head() tag.
	---------------------------------------*/
wp_enqueue_script( 'MY_CUSTOM_SCRIPT', '../[actual_path_to]/MY_CUSTOM_SCRIPT.js' );

/* etc... */
Thereafter you make changes to that file and then replace it on the server. Keep in mind that header.php will be over-written if and when you update your theme, so keep backups of any code you add.
Adding the behaviors we want to the elements we want
The jQuery magic starts when you wrap the selector in $('SELECTOR');. I’ll be creating a set of extWinLinks $('[href^="http"]'); and rcfWinLinks $('.open-in-rcfWin');
There are nearly always more than one way to solve a problem with jQuery. My general approach will be to create a function as the page loads, and call it when the page is ready. I’ll supply more details in the code comments!
To recap: we’ll take all http links and assign target=”extWin” regardless if they’ve got a target attribute set or what it might be set to. We’ll also create a class name to apply to internal links we think should open their own window, but never the same window an external link may already be open in. Bonus: We’ll add the sentence ” … Opens in a new tab or window.” to every link that does that. Because this last bit of code will be repeated in both the previous functions we’ll write it as a standalone function in its own right, and call it from the other two when needed (those jQuery.each(); loops that repeat in each function are good candidates for the same treatment, but I left it so you can better compare what’s happening in each case).
        /*
         * Window openers
         * Require jQuery
         *
         */

          // Declare variables in a single statement at the top of the script.
          // Select external links and store in a variable named extWinLinks
          // Select internal links and store in a variable named rcfWinLinks
          // Create two functions to set the targets on the two sets of elements.
          var
             extWinLinks = $('a[href^="http"]').not( 'a[href~=".rcfouchaux.ca/"]' ), // use a comma if you have more
             rcfWinLinks = $('.open-in-rcfWin'),
             do_extWinLinks = function() {
                 // Set the target attribute to 'extWin'
                 extWinLinks.attr({ target:'extWin' });

                 // Go through each item and get its title if it has one, or set it to an empty string.
                 extWinLinks.each( function( el,i ) {
                     var my = $(this), myTitle = my.attr('title') || '' ;
                         my.attr({ title : appendNotice( myTitle ) });
                 });
             },
             do_rcfWinLinks = function() {
                 // Set the target attribute to 'extWin'
                 rcfWinLinks.attr({ target:'rcfWin' });

                 // Go through each item and get its title if it has one, or set it to an empty string.
                 rcfWinLinks.each( function( el,i ) {
                     var my = $(this), myTitle = my.attr('title') || '' ;
                         my.attr({ title : appendNotice( myTitle ) });
                 });
             },
             appendNotice = function( title ) {
                 // Store the notice as a variable
                 var
                     notice = ' … Opens in a new tab or window.'
                 ;

                 // return the appended notice (but don't add a leading space)
                 // This syntax, if what's left of ? is true returns left of :, otherwise right of :
                 return ( title.length > 0 ) ? title + ' ' + notice : notice ;
             }
          ; // I make the final semicolon obvious so I can find it later

          // Call the functions.
          do_extWinLinks();
          do_rcfWinLinks();
To summarize
Know your organization, your audience, and your content. Use valid HTML wherever you write code. If most of your site visitors are knowledgeable about technology it may not be necessary to open new windows, as they will use their familiar browsing setup to choose when and how to open them, and if your code is valid it will work as they expect. There’s no WCAG 2.0 guideline that says not to open new windows, but we must think more carefully about how doing so may create barriers to ease of access and use. We might consider limiting their number—by using a named window, not the well-known keyword _blank—and warn our users it will open in a way that screen readers will discover and convey to any users who may be using one. This discussion follows a line of thinking you can adapt to meeting other WCAG 2.0 success criteria. This JavaScript shows only one way to reduce the number of windows your site opens, and to inform users in advance in a way their technology can understand.
I’ve coded all the external links in this post differently, but they should all open in the same tab or window. Hover your mouse over any links on this page to see if the ” … Opens in a new tab or window” notice worked. Here’s a class="open-in-rcfWin" internal link and here’s another one. The next one has no class set, so it will replace the content of this page with the home page: ciao for now!
§
Understanding WCAG 2.0 Latest version: www.w3.org/TR/UNDERSTANDING-WCAG20/
How to Meet WCAG 2.0 – Quick Reference: www.w3.org/WAI/WCAG20/quickref/
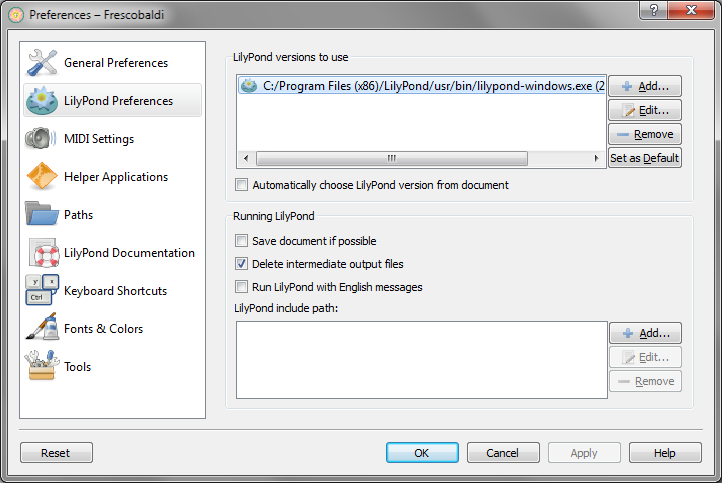
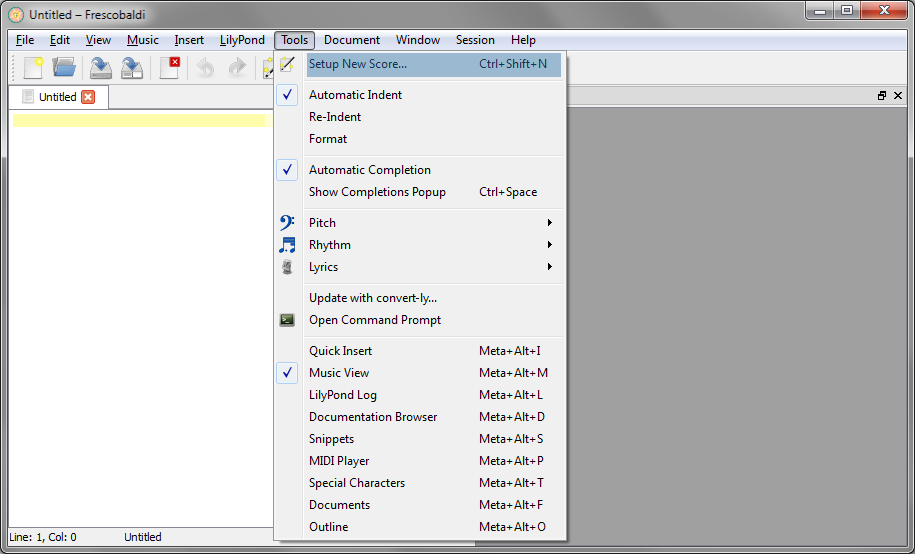
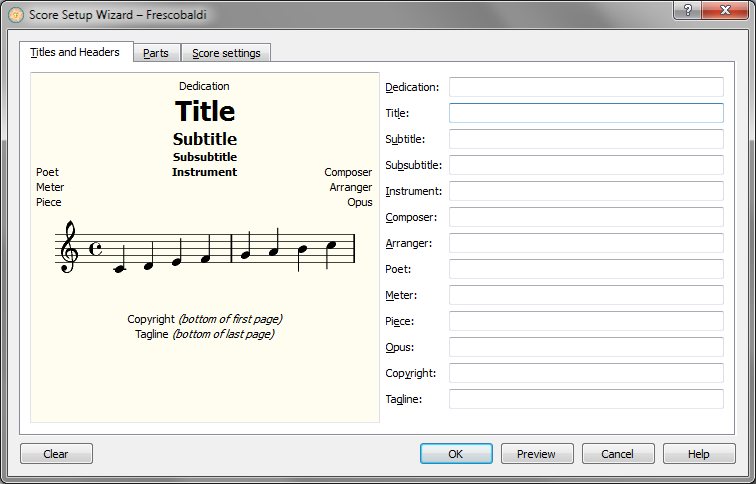
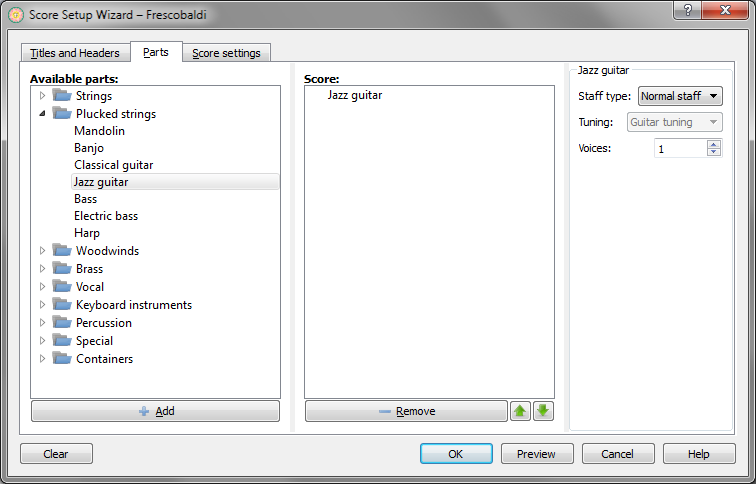
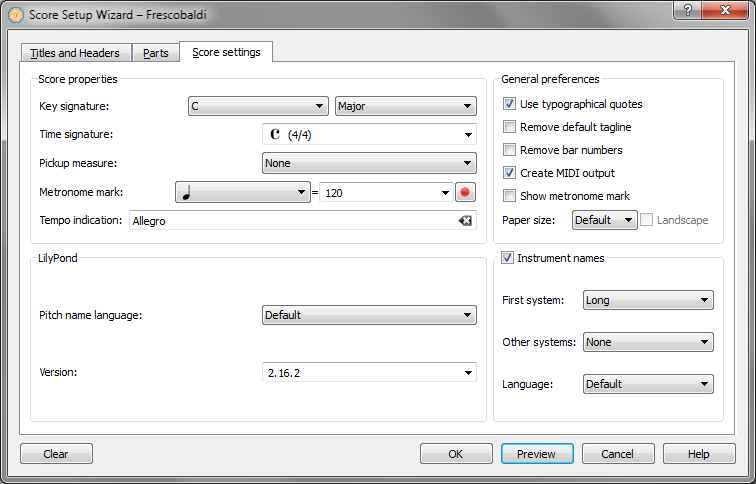
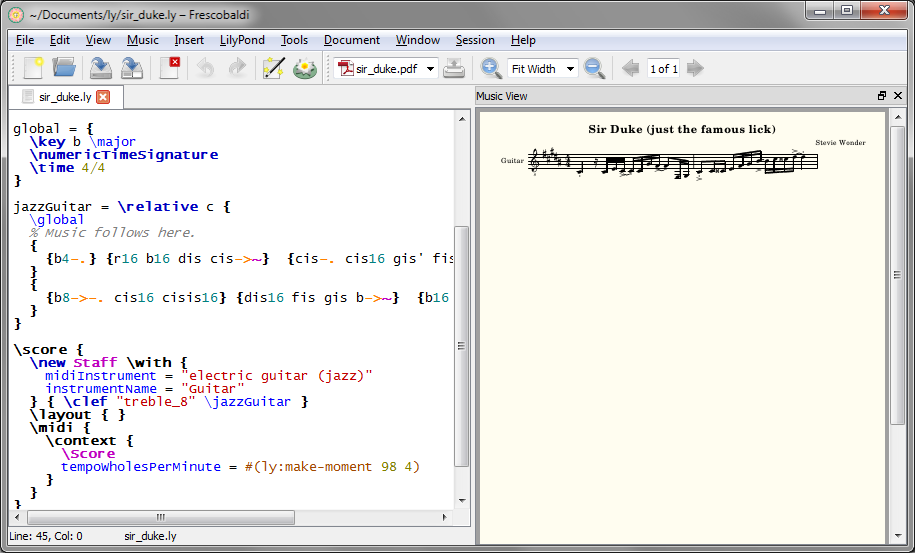
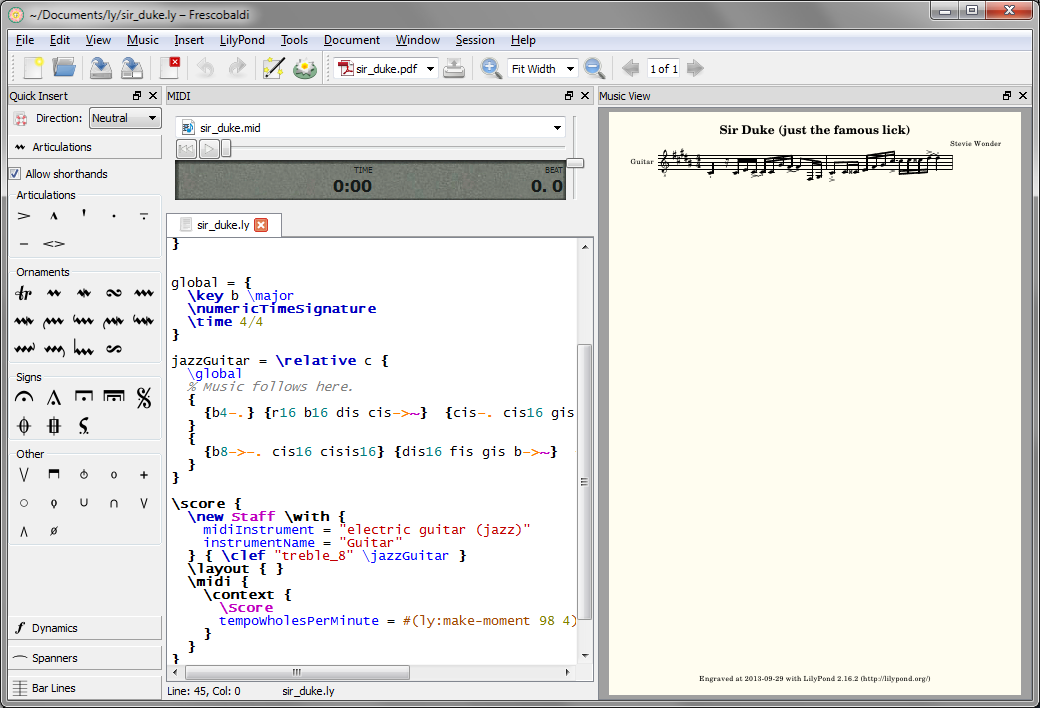
 engraved with LilyPond, version 2.17.27") LilyPond is open source music engraving software. LilyPond “…was designed to solve the problems we found in existing software and to create beautiful music that mimics the finest hand-engraved scores.” It produces some of the finest looking scores you can imagine, and almost any style of note or notation you can imagine. But it’s a scripting language—which for many people makes it very difficult to learn, and much too tedious to use. Enter Frescobaldi.
LilyPond is open source music engraving software. LilyPond “…was designed to solve the problems we found in existing software and to create beautiful music that mimics the finest hand-engraved scores.” It produces some of the finest looking scores you can imagine, and almost any style of note or notation you can imagine. But it’s a scripting language—which for many people makes it very difficult to learn, and much too tedious to use. Enter Frescobaldi.
") With the slow but steady demise of Flash, SWF-based elearning software makers, like Adobe, have been “cramming” (a word from disruptive innovation) HTML5 into their products, like Captivate (I’m using v6.1), to keep up. Because the HTML5 spec itself is still growing in inconsistent and at times uncertain directions there are bound to be holes and gaps in the implementations. For Captivate 6.1 the first one I encountered was the “This browser does not support some of the content…” error I got when I attempted to view my HTML5 output in my browser of choice—Firefox. It was version 20, and I know Firefox has supported HTML5 audio and video tags since version 3.5 so it had to be something silly. In the proprietary software world that may mean license issues, and so it does with Firefox (Free, Open, Libre software) and the MP3 (not so much). Captivate exports only MP3s, Firefox (and Opera) play only OGGs. So until Adobe offers a checkbox on the Publishing page you can do the following, or hope your visitors use only IE, Safari or Chrome—as the majority probably do… but we’re big on inclusion around here so let’s not leave anyone out!
With the slow but steady demise of Flash, SWF-based elearning software makers, like Adobe, have been “cramming” (a word from disruptive innovation) HTML5 into their products, like Captivate (I’m using v6.1), to keep up. Because the HTML5 spec itself is still growing in inconsistent and at times uncertain directions there are bound to be holes and gaps in the implementations. For Captivate 6.1 the first one I encountered was the “This browser does not support some of the content…” error I got when I attempted to view my HTML5 output in my browser of choice—Firefox. It was version 20, and I know Firefox has supported HTML5 audio and video tags since version 3.5 so it had to be something silly. In the proprietary software world that may mean license issues, and so it does with Firefox (Free, Open, Libre software) and the MP3 (not so much). Captivate exports only MP3s, Firefox (and Opera) play only OGGs. So until Adobe offers a checkbox on the Publishing page you can do the following, or hope your visitors use only IE, Safari or Chrome—as the majority probably do… but we’re big on inclusion around here so let’s not leave anyone out!